How To: Create an Invoice
Once you've created a job and added job details, the option to create an invoice will be available.
Laptop/Desktop Instructions
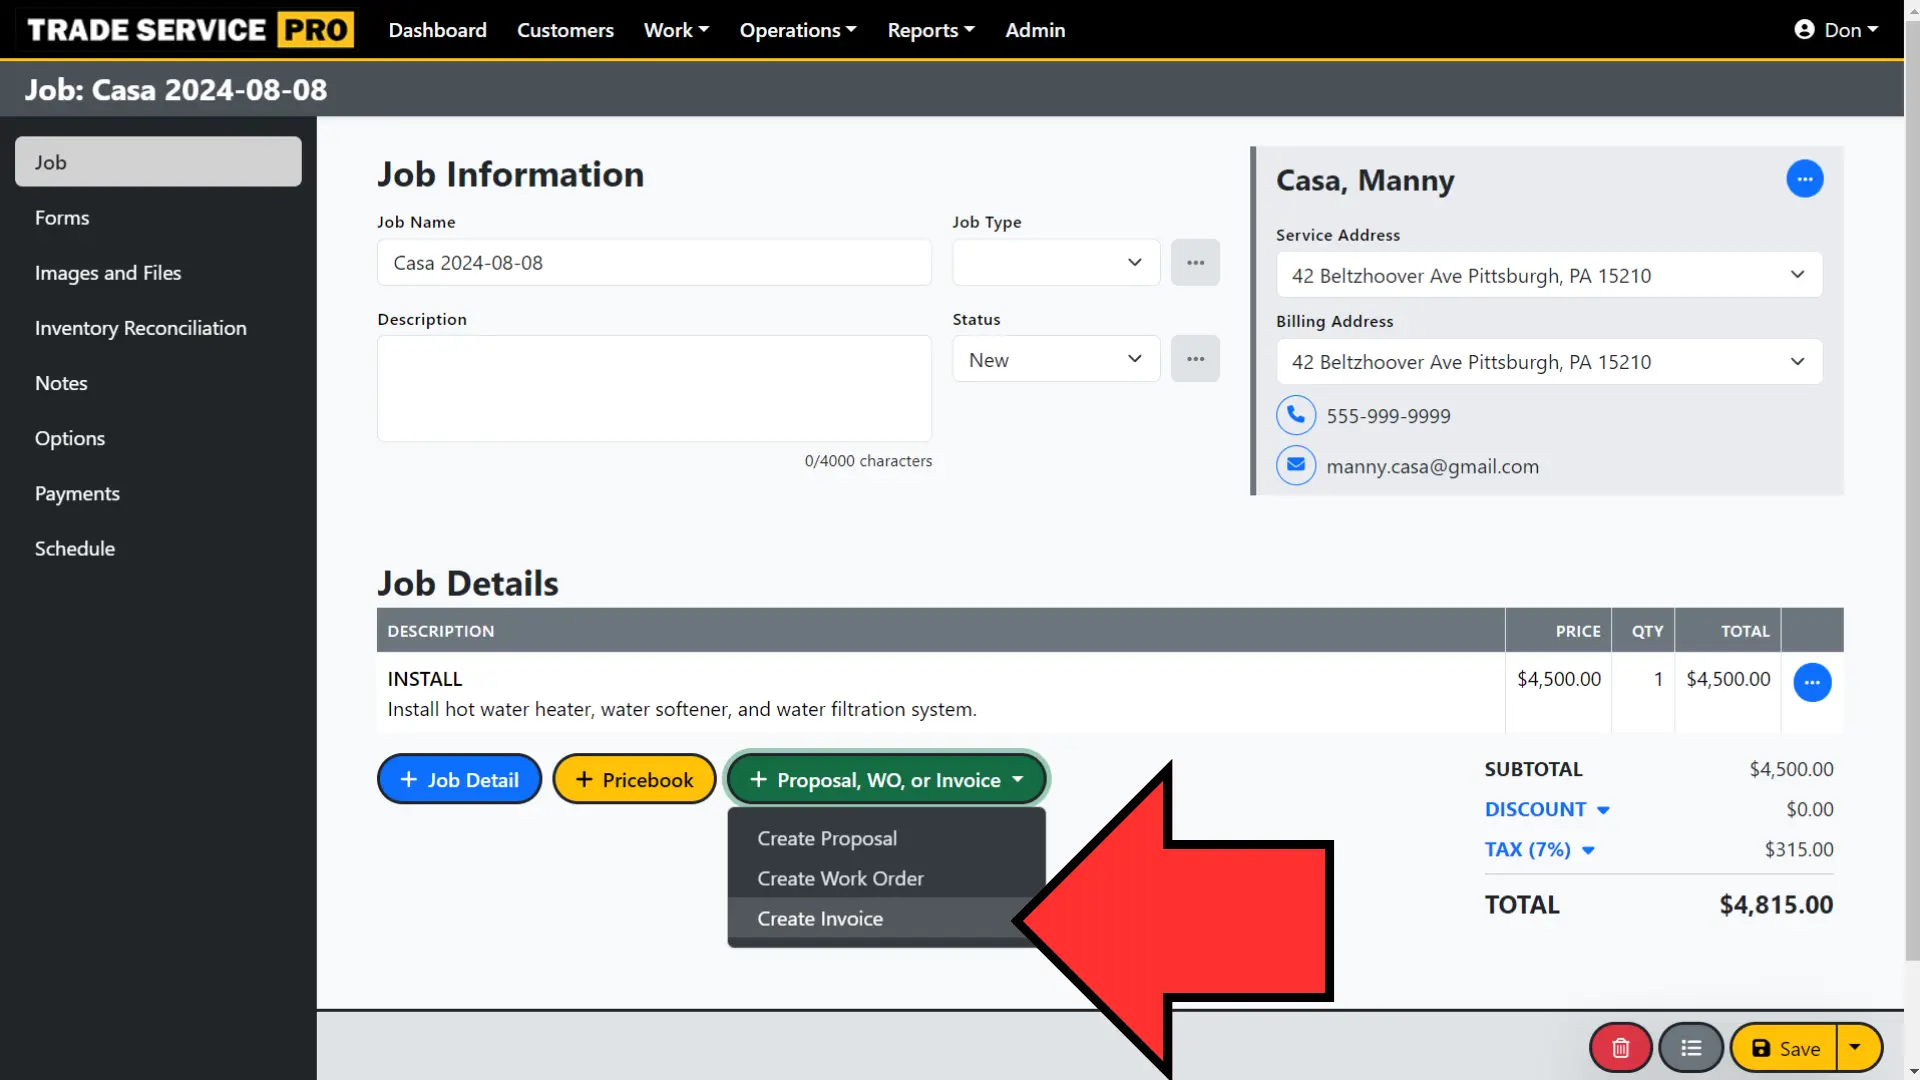
Click on the + Proposal, WO, or Invoice button, then select Create Invoice.
When the Create Invoice option is selected a dialog will be displayed with a financial summary of the invoice as well as many options for the creation of the invoice.
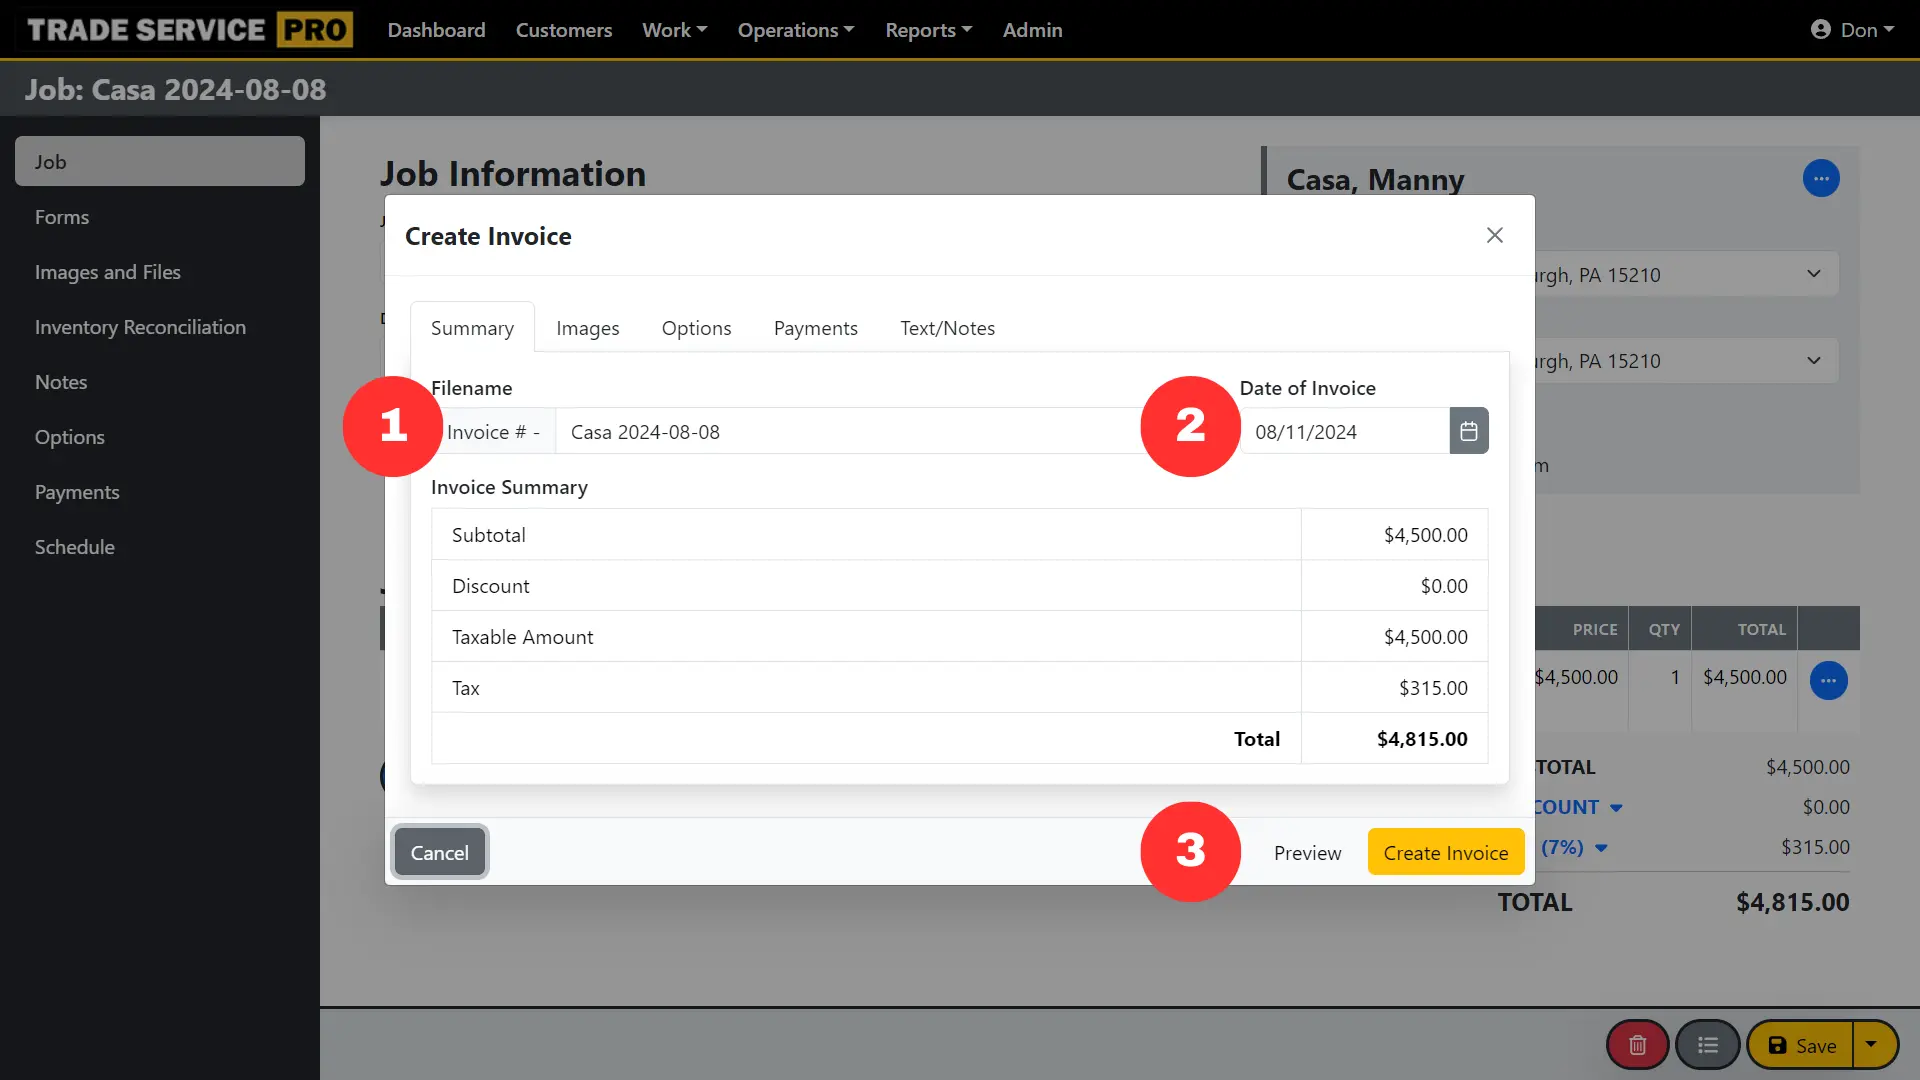
- The filename of the invoice will default to the job name. This can be changed to anything you like.
- The date of the invoice will default to today's date. You can change this to any date, this is helpful if you need to backdate the invoice or change the date for any reason.
- There are actions to either Preview or Create the invoice.
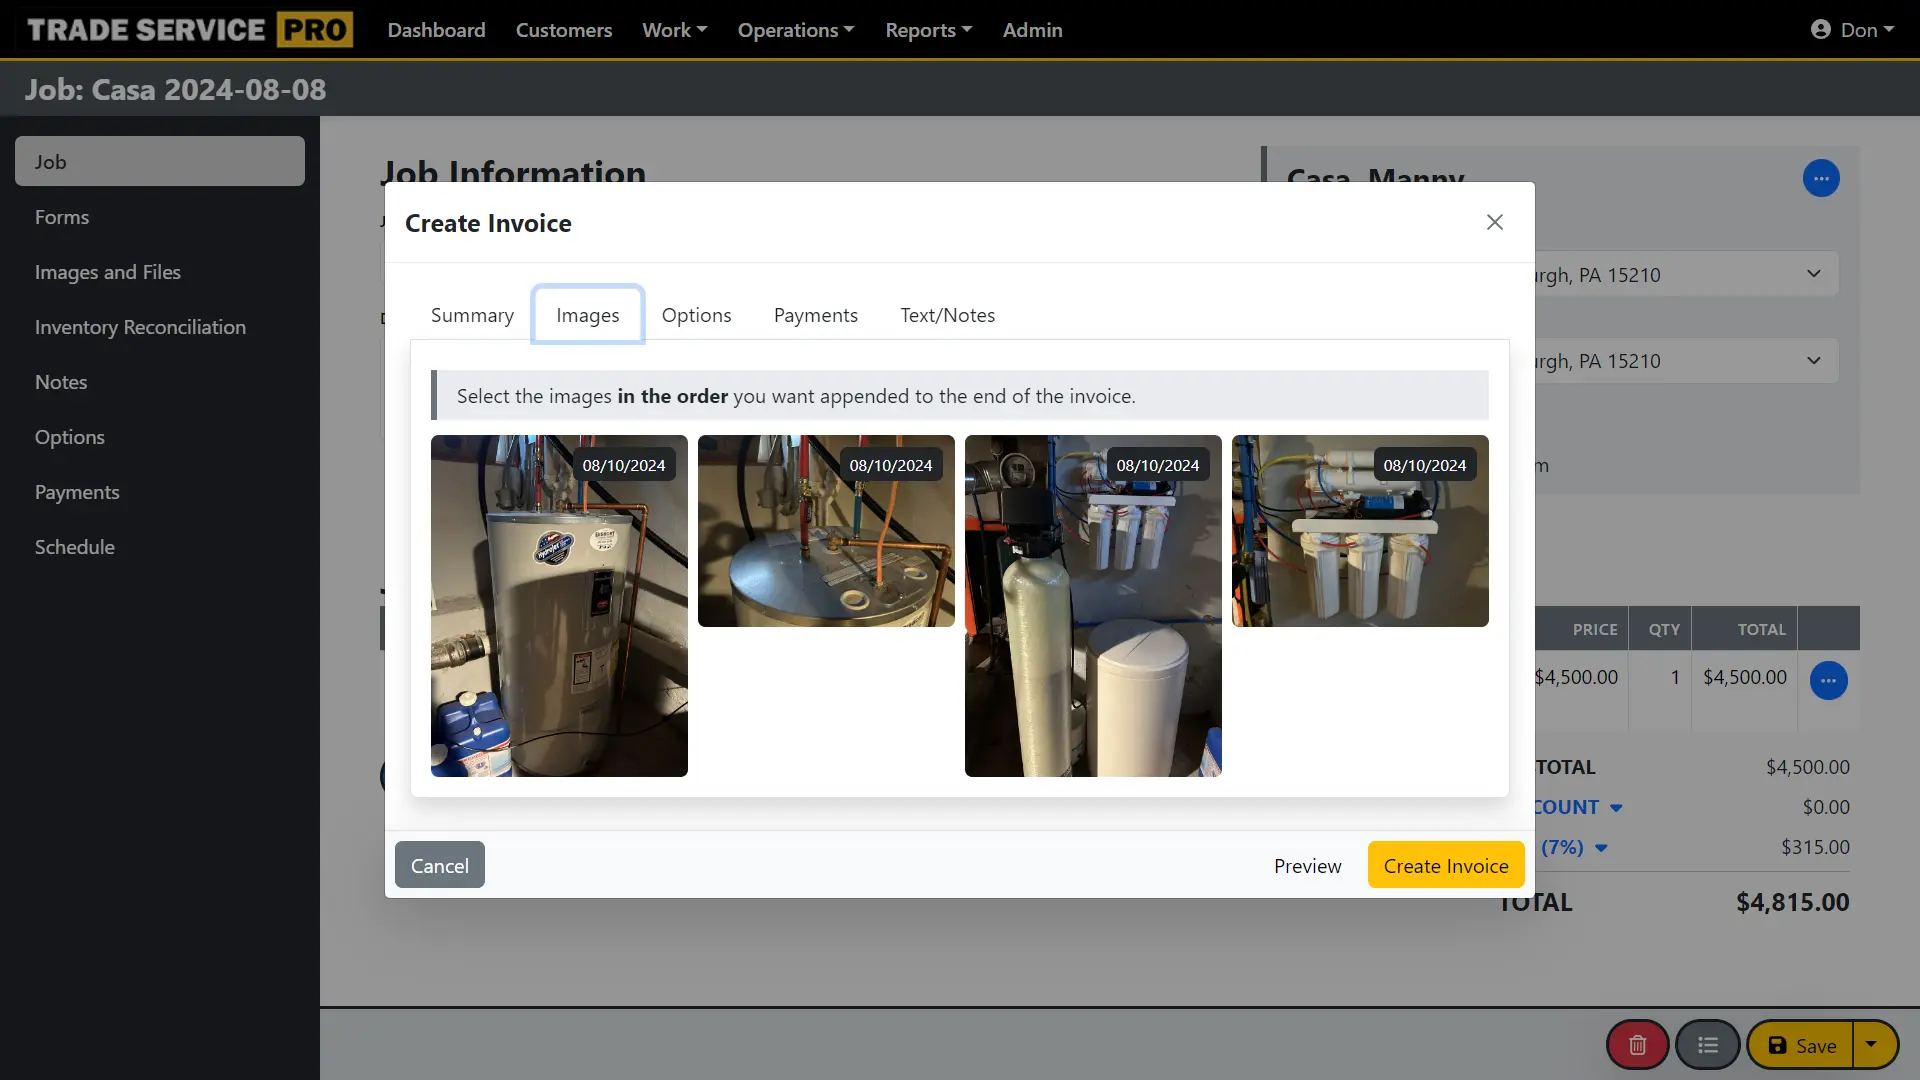
The second tab of the create invoice dialog displays images that have been uploaded to a job. Select the images you want to be included in the invoice.
There are additional tabs for invoice options, as well as applying any existing job payments (such as a down payment made against an invoice) to the invoice.
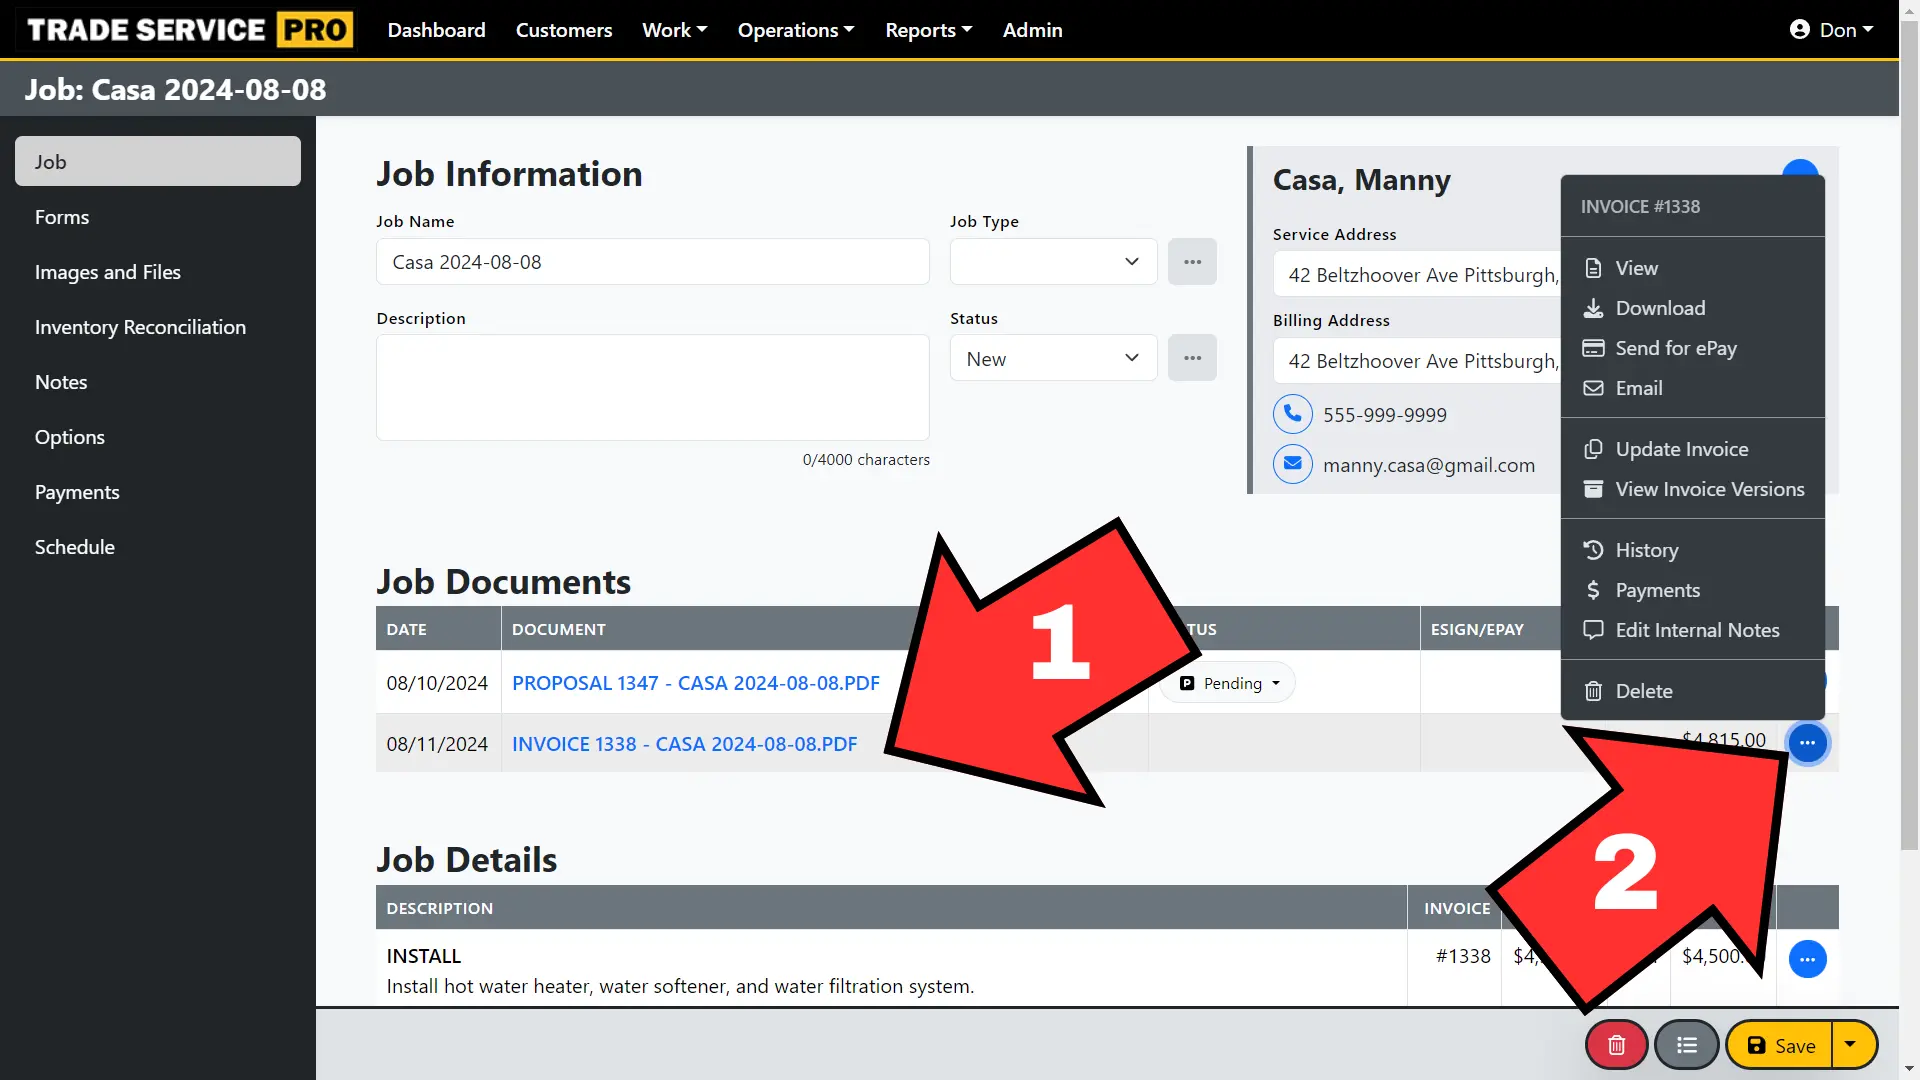
- After the invoice has been created it will be listed under the Job Documents section of the Job Editor.
- Clicking on the action button (the blue circle with the three dots) for the invoice will display a list of options available for that invoice, such as emailing it to a customer or sending it to a customer for ePay.
Mobile Device Instructions
Creating an invoice on a mobile device is a similar process to creating an invoice on a laptop or desktop. The screens will obviously be different based on the smaller screen size of a mobile device.
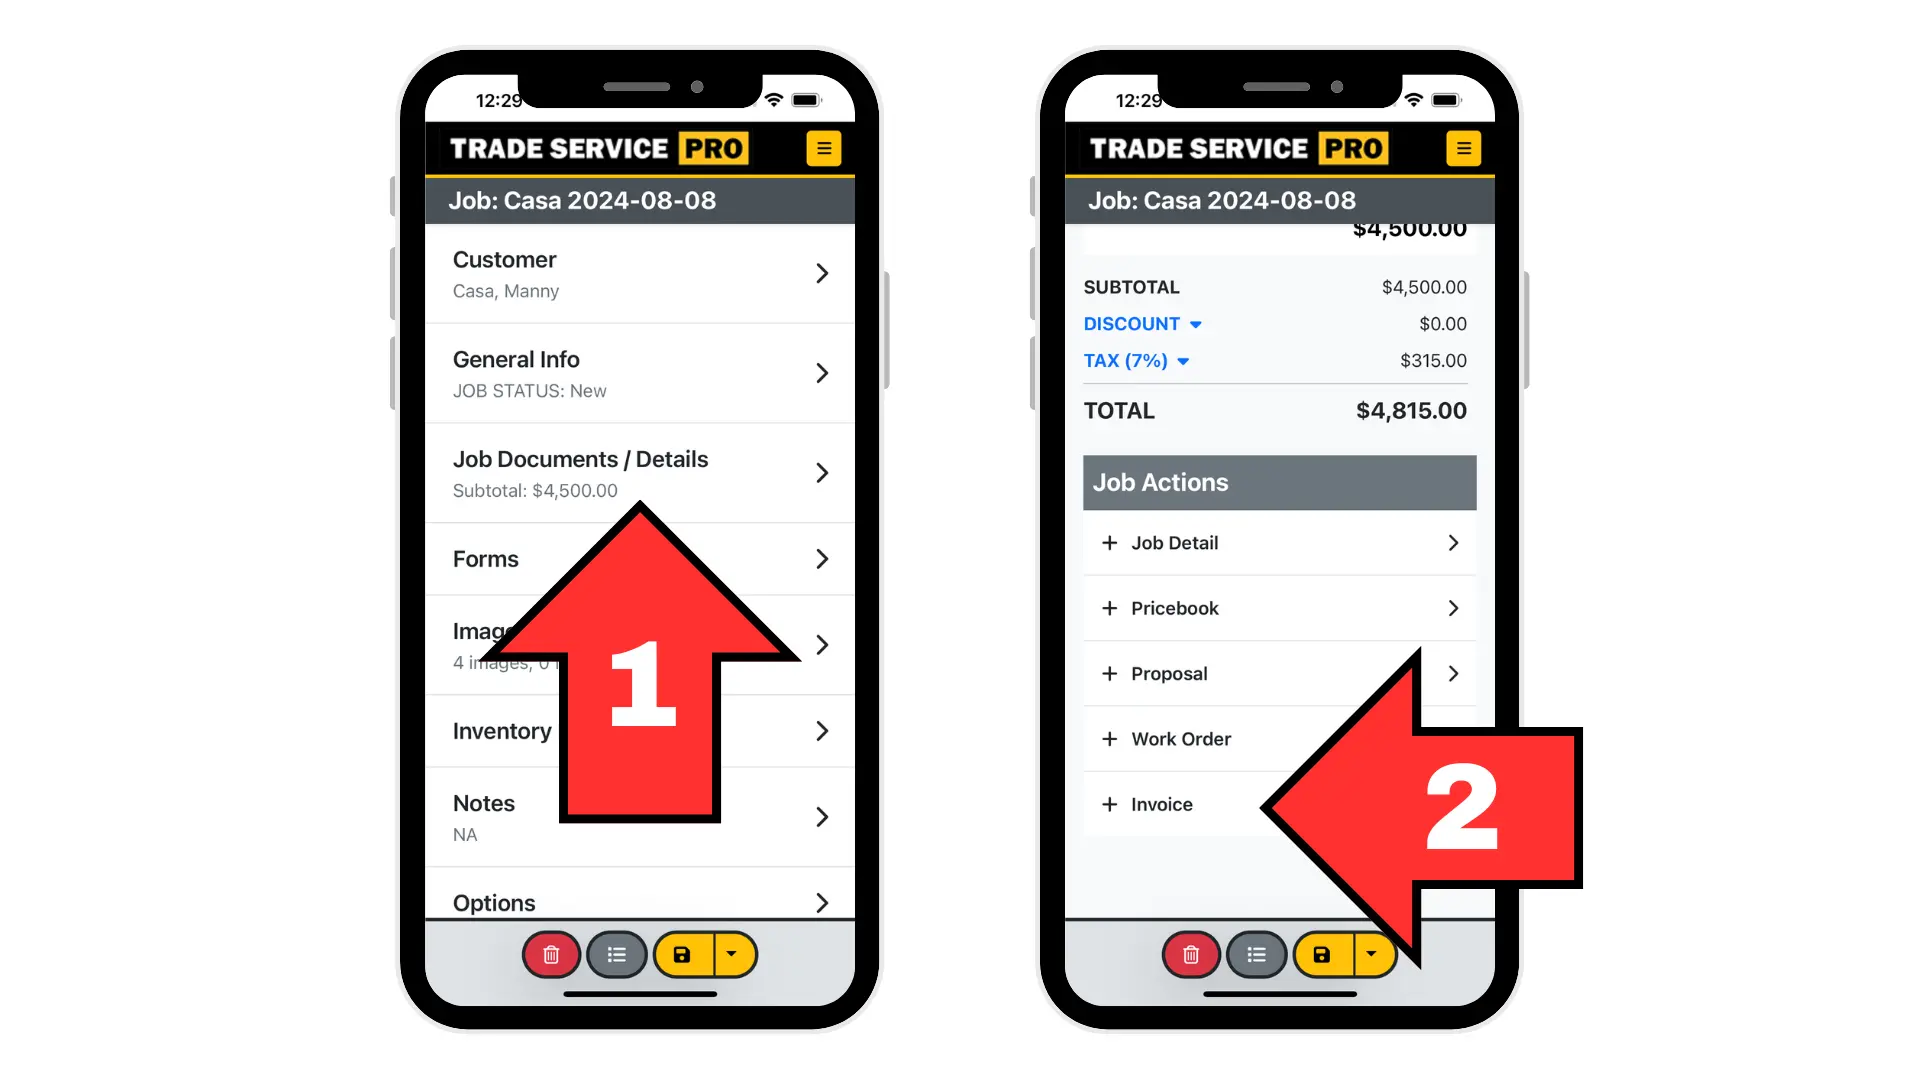
- Once the job has been created, if you aren't already on the job documents/details mobile screen, click on the Job Documents/Details mobile navigation menu item.
- Scroll down to the Job Actions section and select + Invoice.

- The default summary tab will display the basic information for the invoice. The filename of the invoice will default to the job name. This can be changed to anything you like. The date of the invoice will default to today's date. You can change this to any date, this is helpful if you need to backdate the invoice or change the date for any reason.
- The second tab of the create invoice dialog displays images that have been uploaded to a job. Select the images you want to be included in the invoice.
- The third tab of the create invoice dialog presents many options for creating the invoice and actions to take after the invoice has been created.
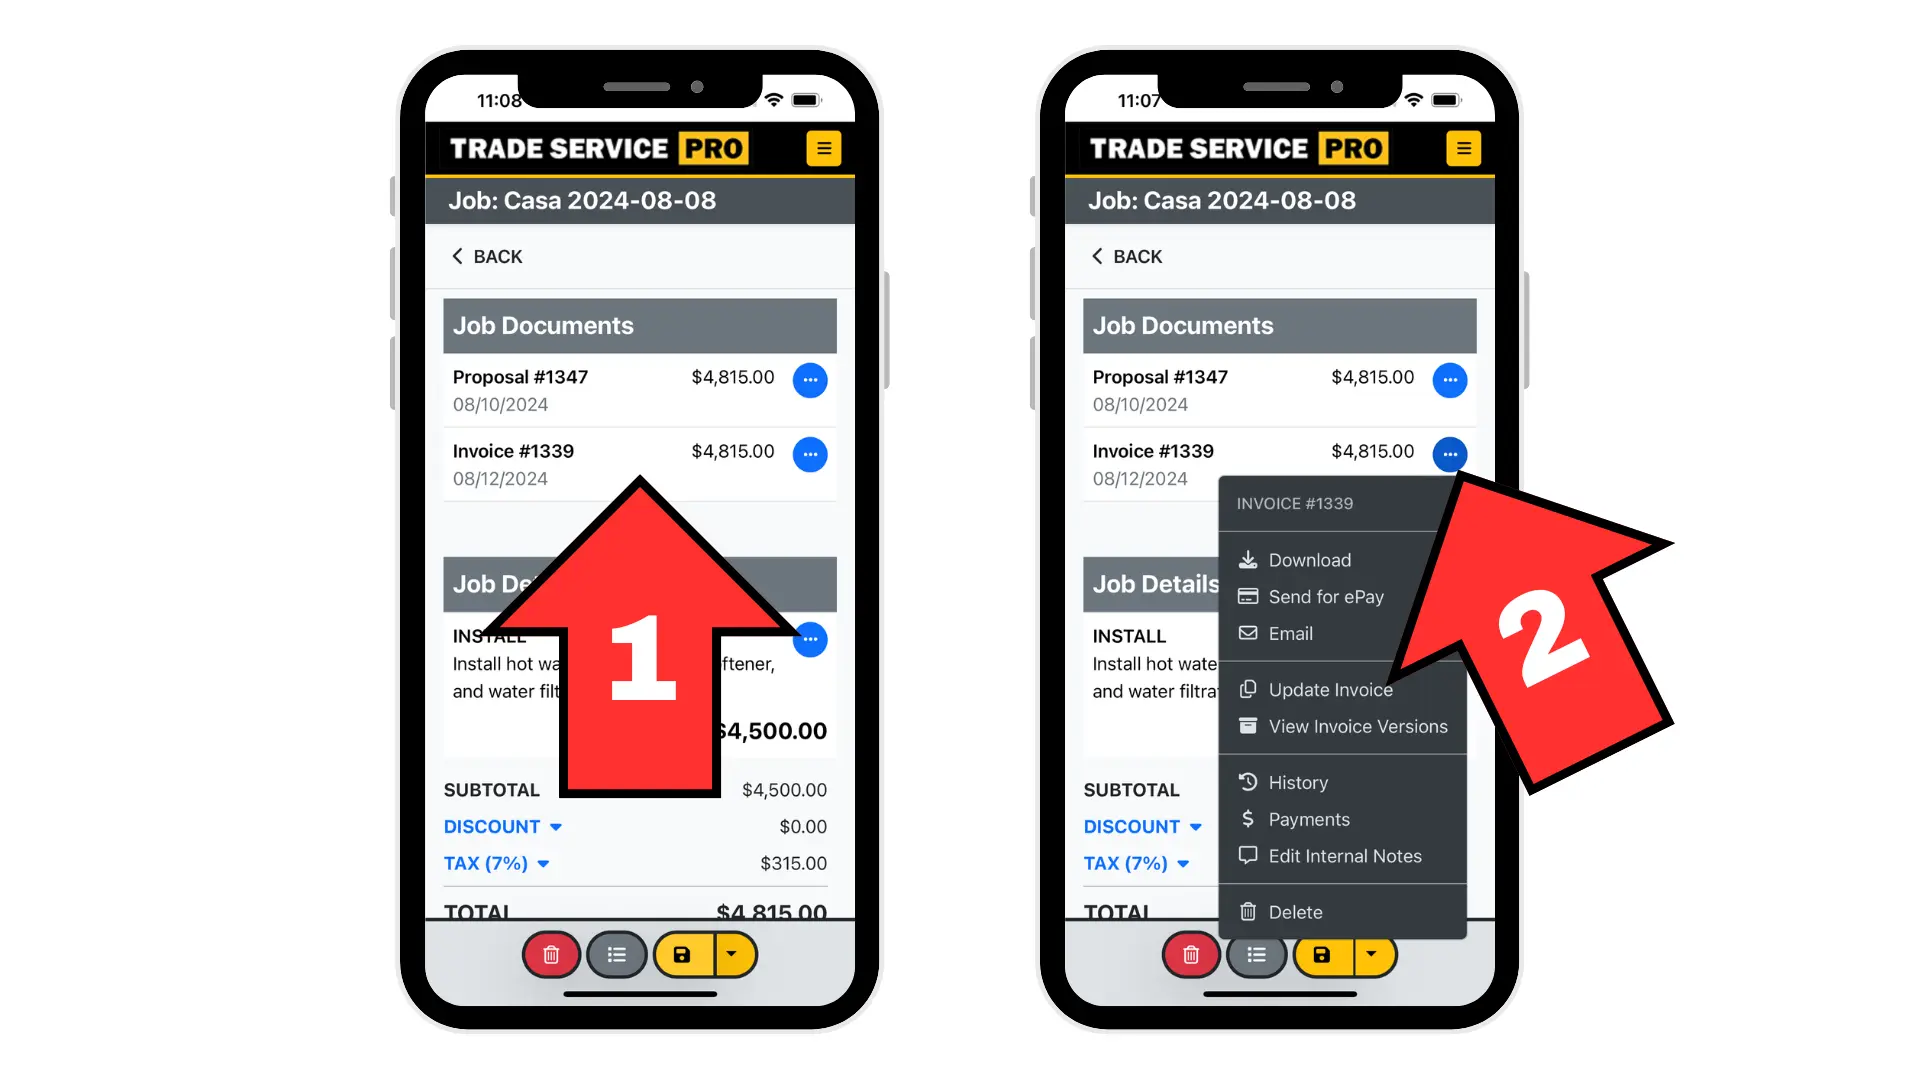
- After the invoice has been created it will be listed under the Job Documents section of the Job Editor.
- Clicking on the action button (the blue circle with the three dots) for the invoice will display a list of options available for that invoice, such as emailing it to a customer or sending it to a customer for ePay.