How To: Create a Job
A job represents work that is to be done or has been done for a customer. A job consists of a number of elements:
- Customer service address and billing address.
- Job details - the line items of a job
- Images of the job, such as before and after photos that can optionally be included on proposals and invoices.
- Files associated with the job; this could be anything from a signed customer contract to receipts for the job.
- Payments - credit card, cash, and check payments can all be recorded for a job.
- Job options such as discount, tax override, payment terms, etc.
Laptop/Desktop Instructions
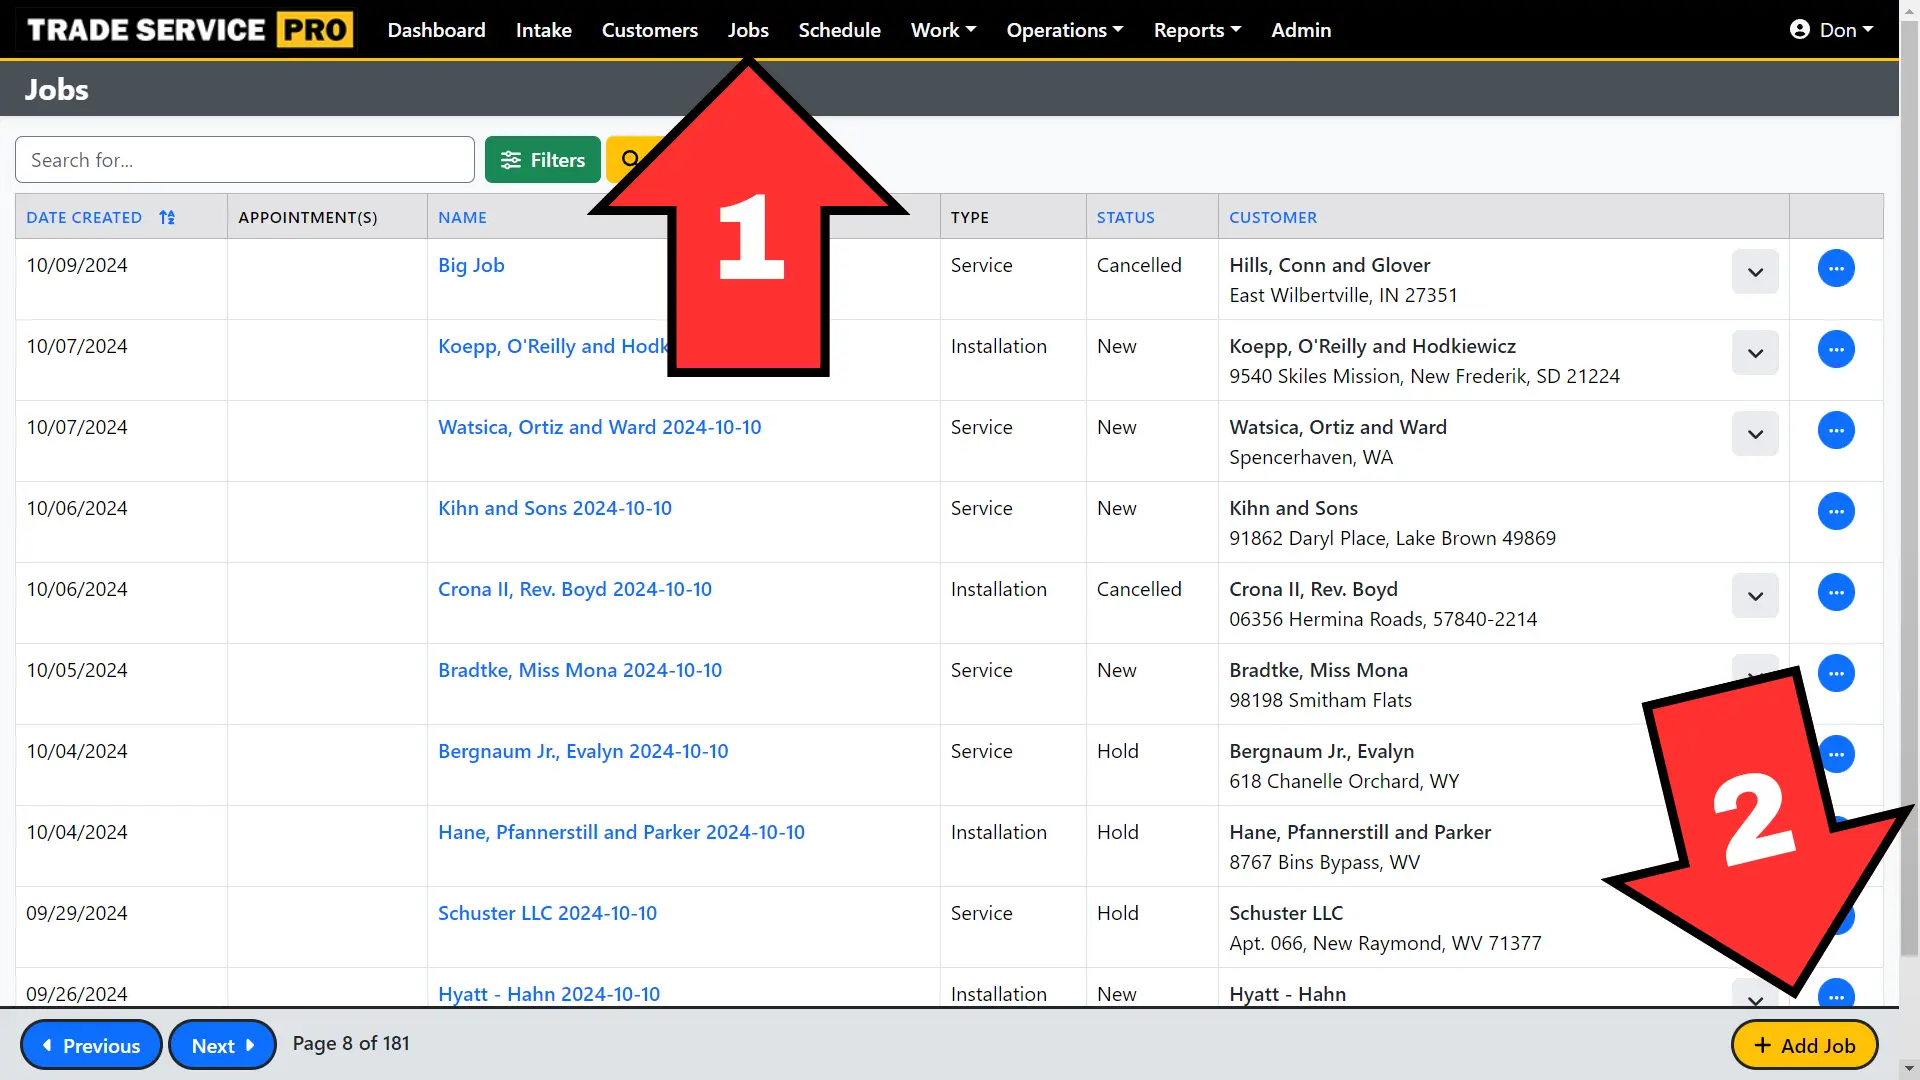
- If you aren't already on the job list, click on the Jobs menu item.
- Then click on the + Add Job button in the bottom right corner of the screen. (This is where you'll find the add button for most features.)
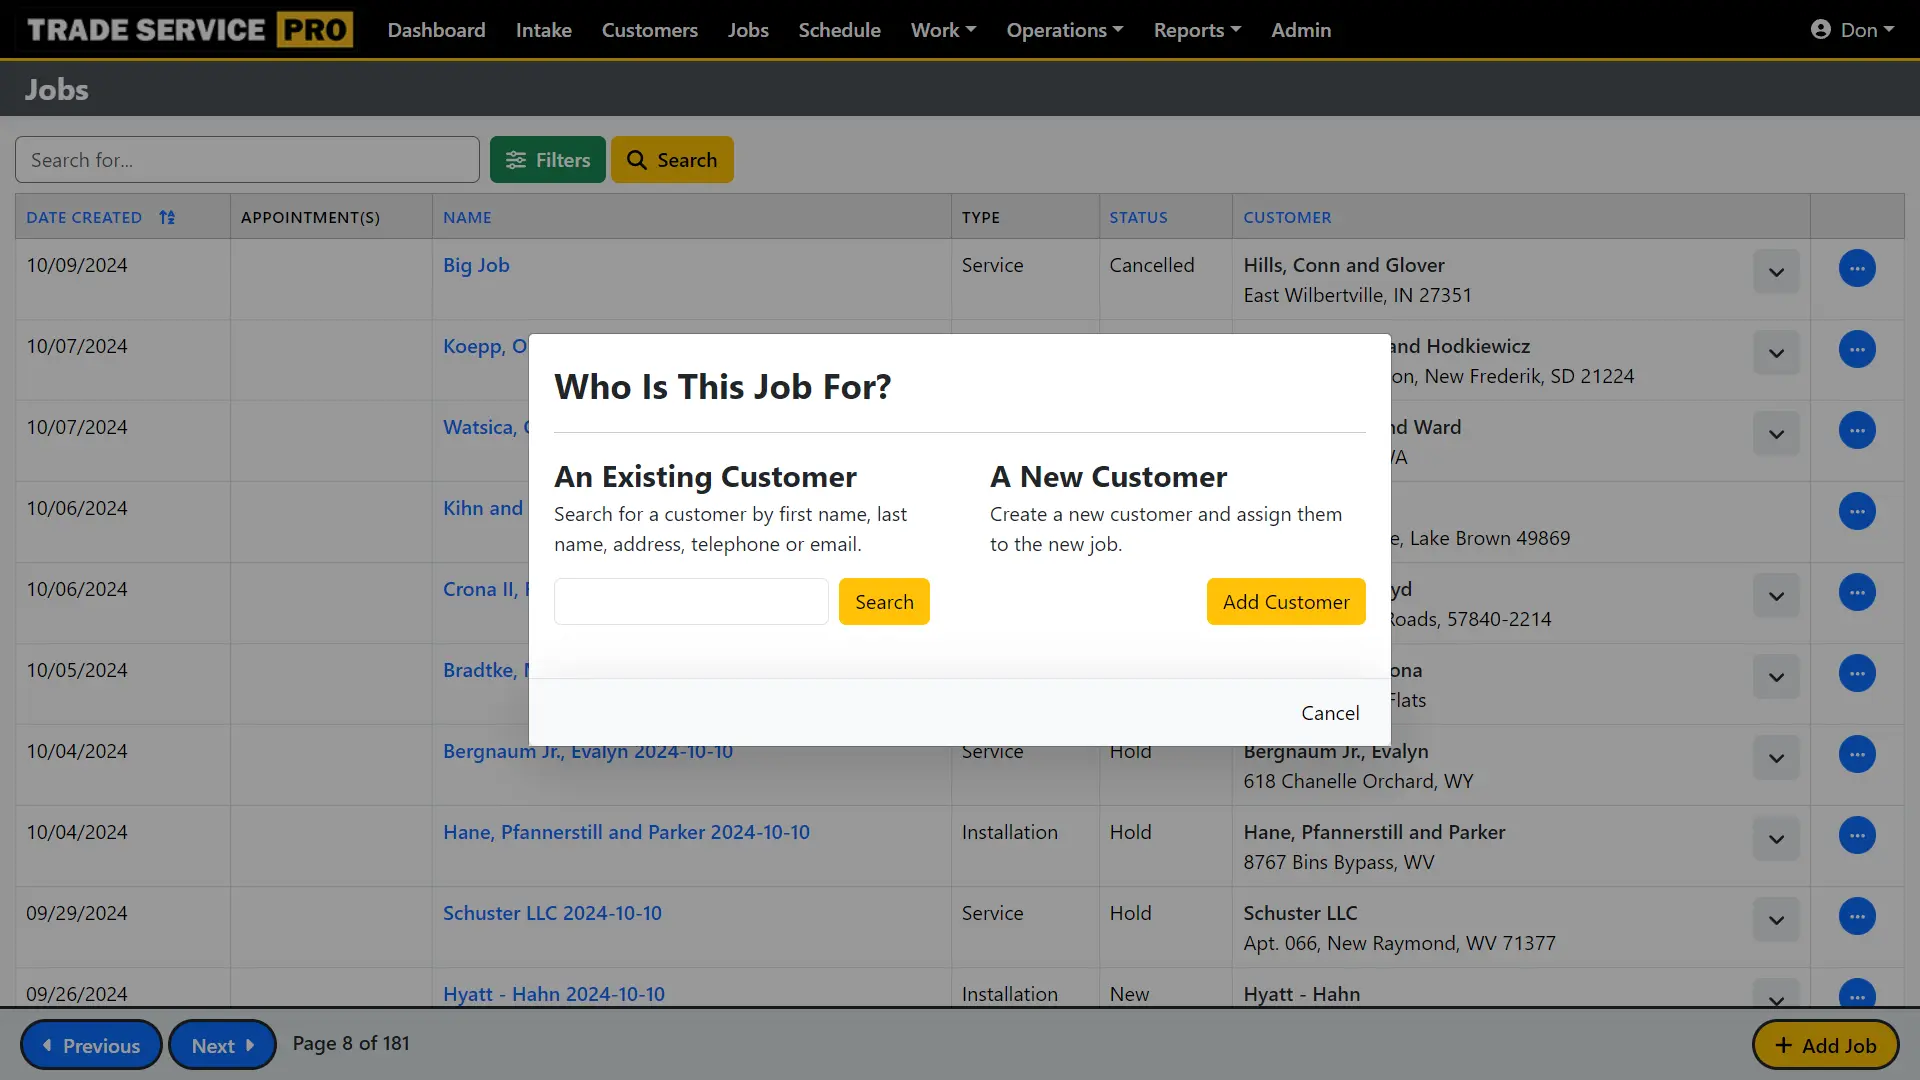
The first step in creating a job is to search for, and select an existing customer, or to create a new customer. You can search for a customer by entering any of the following:
- First Name
- Last Name
- Address
- Telephone
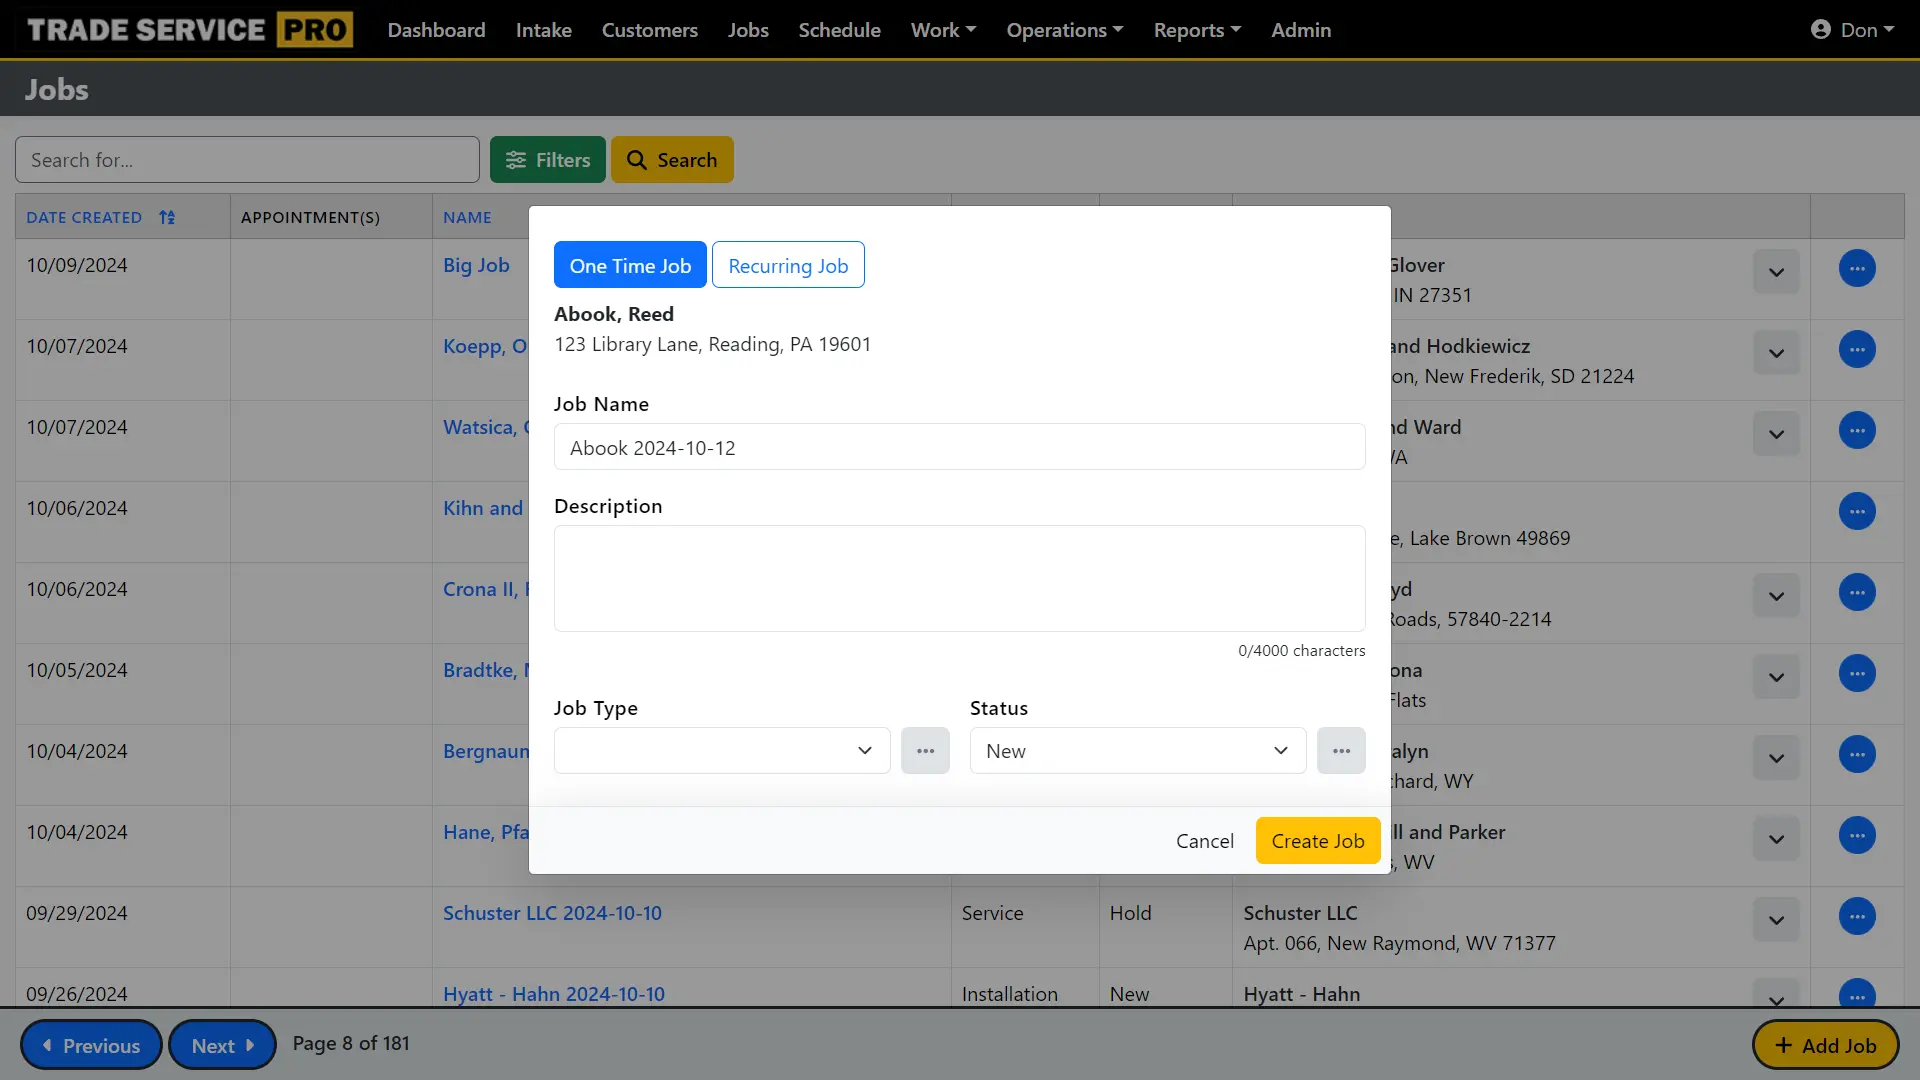
After creating a new customer or selecting an existing customer the create job modal will display. The job name will default to the customer's last name and a date stamp, you can change this to whatever you like. After entering some basic details about the job click on the Create Job button.
Once the job has been created the full job editor will be displayed. The full job editor offers many more features and options. You can explore these features and options from the left nav.
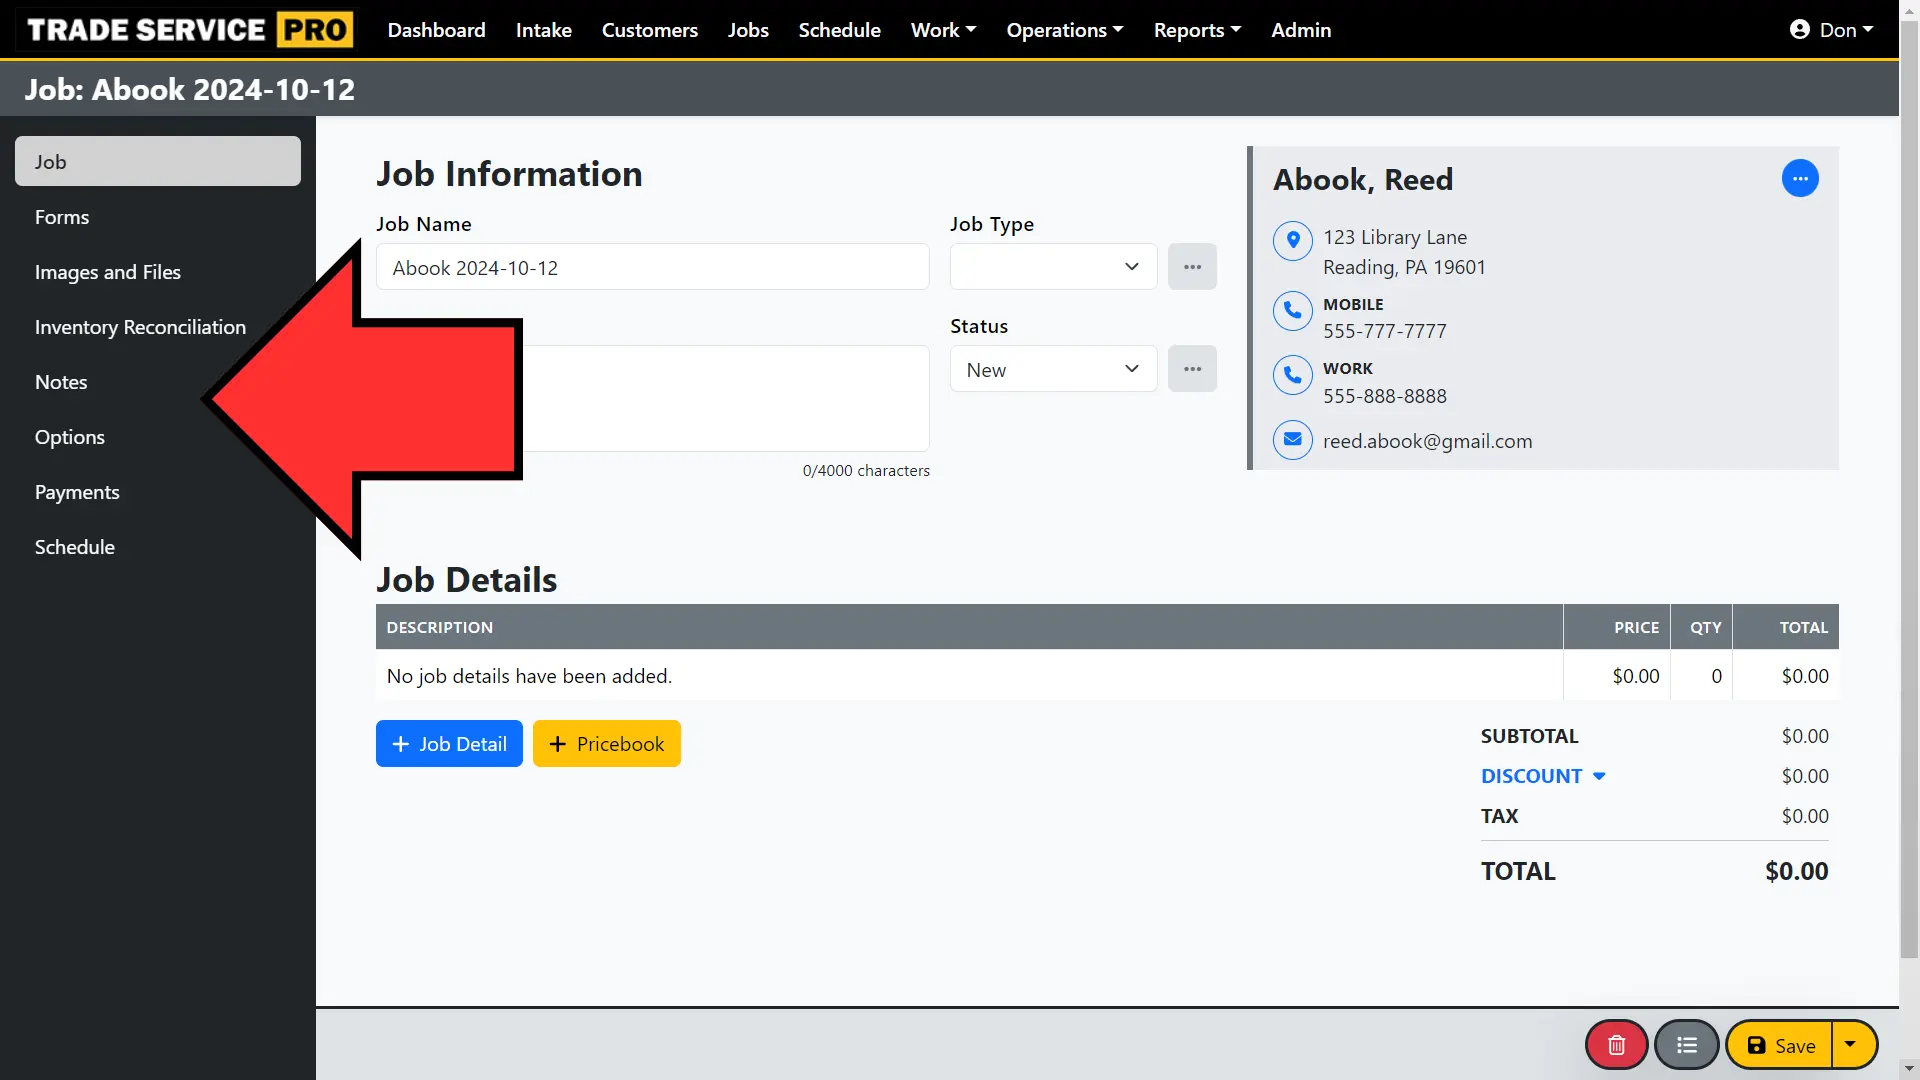
Job: from this section you can do things such as adding job details, creating proposals, creating invoices, setting a discount, and setting a tax override.
Forms: assign and edit custom data forms to capture detailed information about a job. For example, a cleaning company might have a detailed checklist that is completed for each job.
Images and Files: upload images and files related to the job, add these photos to proposals and invoices to better communicate to a customer what work is to be done, or what work has been completed.
Inventory Reconciliation: inventory used on a job can be reconciled against inventory levels managed in the pricebook.
Notes: free form text for creating any customer related notes.
Options: from here you can set a payment term, discount, tax override, and add job tags.
Payments: payments can be added to a job without having an invoice created, this provides the option for collecting a down payment for a job without having to create an invoice. Cash and check payments can be recorded, and receipts can be emailed to your customers.
Schedule: view past and present appointments and schedule new appointments for the job.
Mobile Device Instructions
Creating a job on a mobile device is a similar process to creating a customer on a laptop or desktop. The screens will obviously be different based on the smaller screen size of a mobile device.
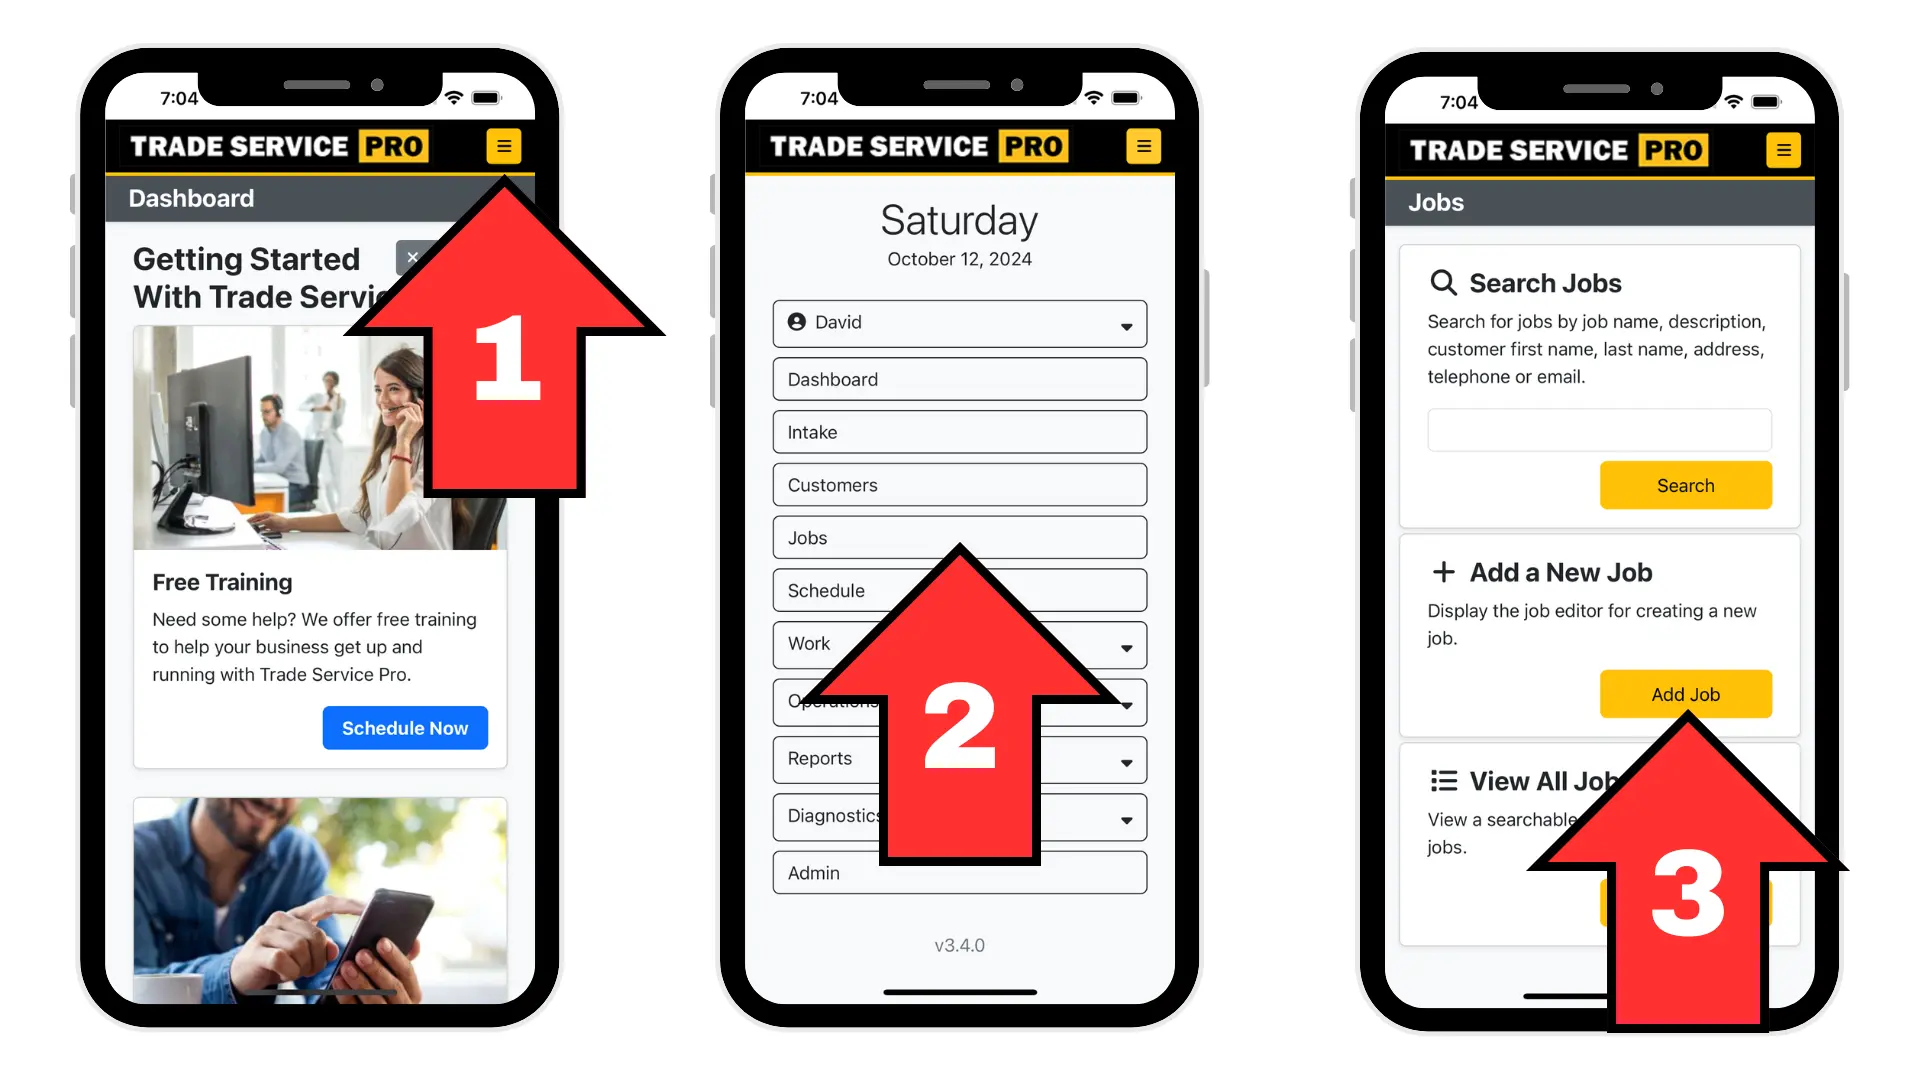
- From any page click on the yellow icon with the 3 lines (aka the hamburger button) on the top right of the mobile screen.
- The mobile navigation menu will be displayed. Click on the Jobs button.
- Next, the customers mobile page will display which presents three options for working with job data. Click on the Add Job button.
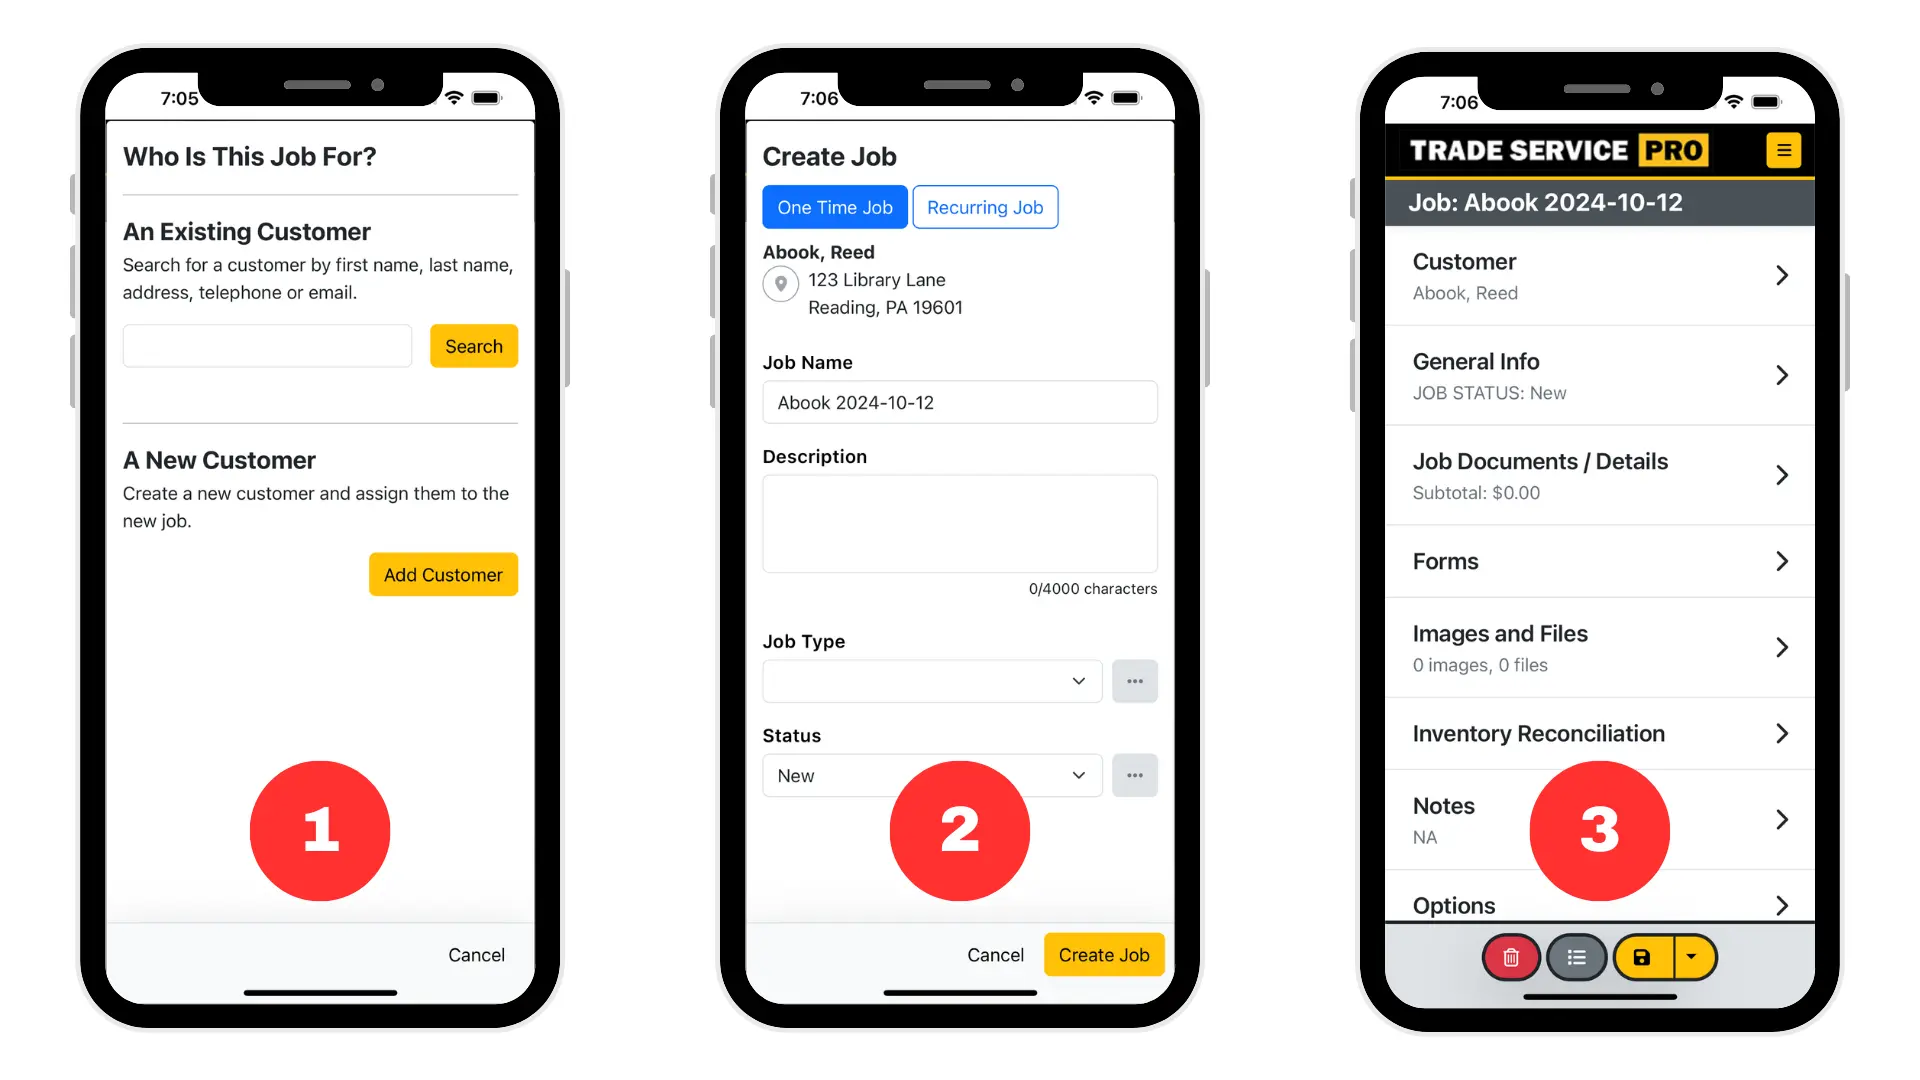
- The create job workflow will now prompt you to search for an existing customer or to create a new customer.
- After creating a new customer or selecting an existing customer the create job modal will display. The job name will default to the customer's last name and a date stamp, you can change this to whatever you like. After entering some basic details about the job click on the Create Job button.
- After creating the job, the mobile job editor will be displayed. The full job editor offers many more features and options.
The full job editor features and options include...
Job: from this section you can do things such as adding job details, creating proposals, creating invoices, setting a discount, and setting a tax override.
Forms: assign and edit custom data forms to capture detailed information about a job. For example, a cleaning company might have a detailed checklist that is completed for each job.
Images and Files: upload images and files related to the job, add these photos to proposals and invoices to better communicate to a customer what work is to be done, or what work has been completed.
Inventory Reconciliation: inventory used on a job can be reconciled against inventory levels managed in the pricebook.
Notes: free form text for creating any customer related notes.
Options: from here you can set a payment term, discount, tax override, and add job tags.
Payments: payments can be added to a job without having an invoice created, this provides the option for collecting a down payment for a job without having to create an invoice. Cash and check payments can be recorded, and receipts can be emailed to your customers.
Schedule: view past and present appointments and schedule new appointments for the job.