How To: Create a Customer
Creating customer records in Trade Service Pro is a common task that many other features are anchored around. It only takes a few seconds to create a customer record.
Laptop/Desktop Instructions
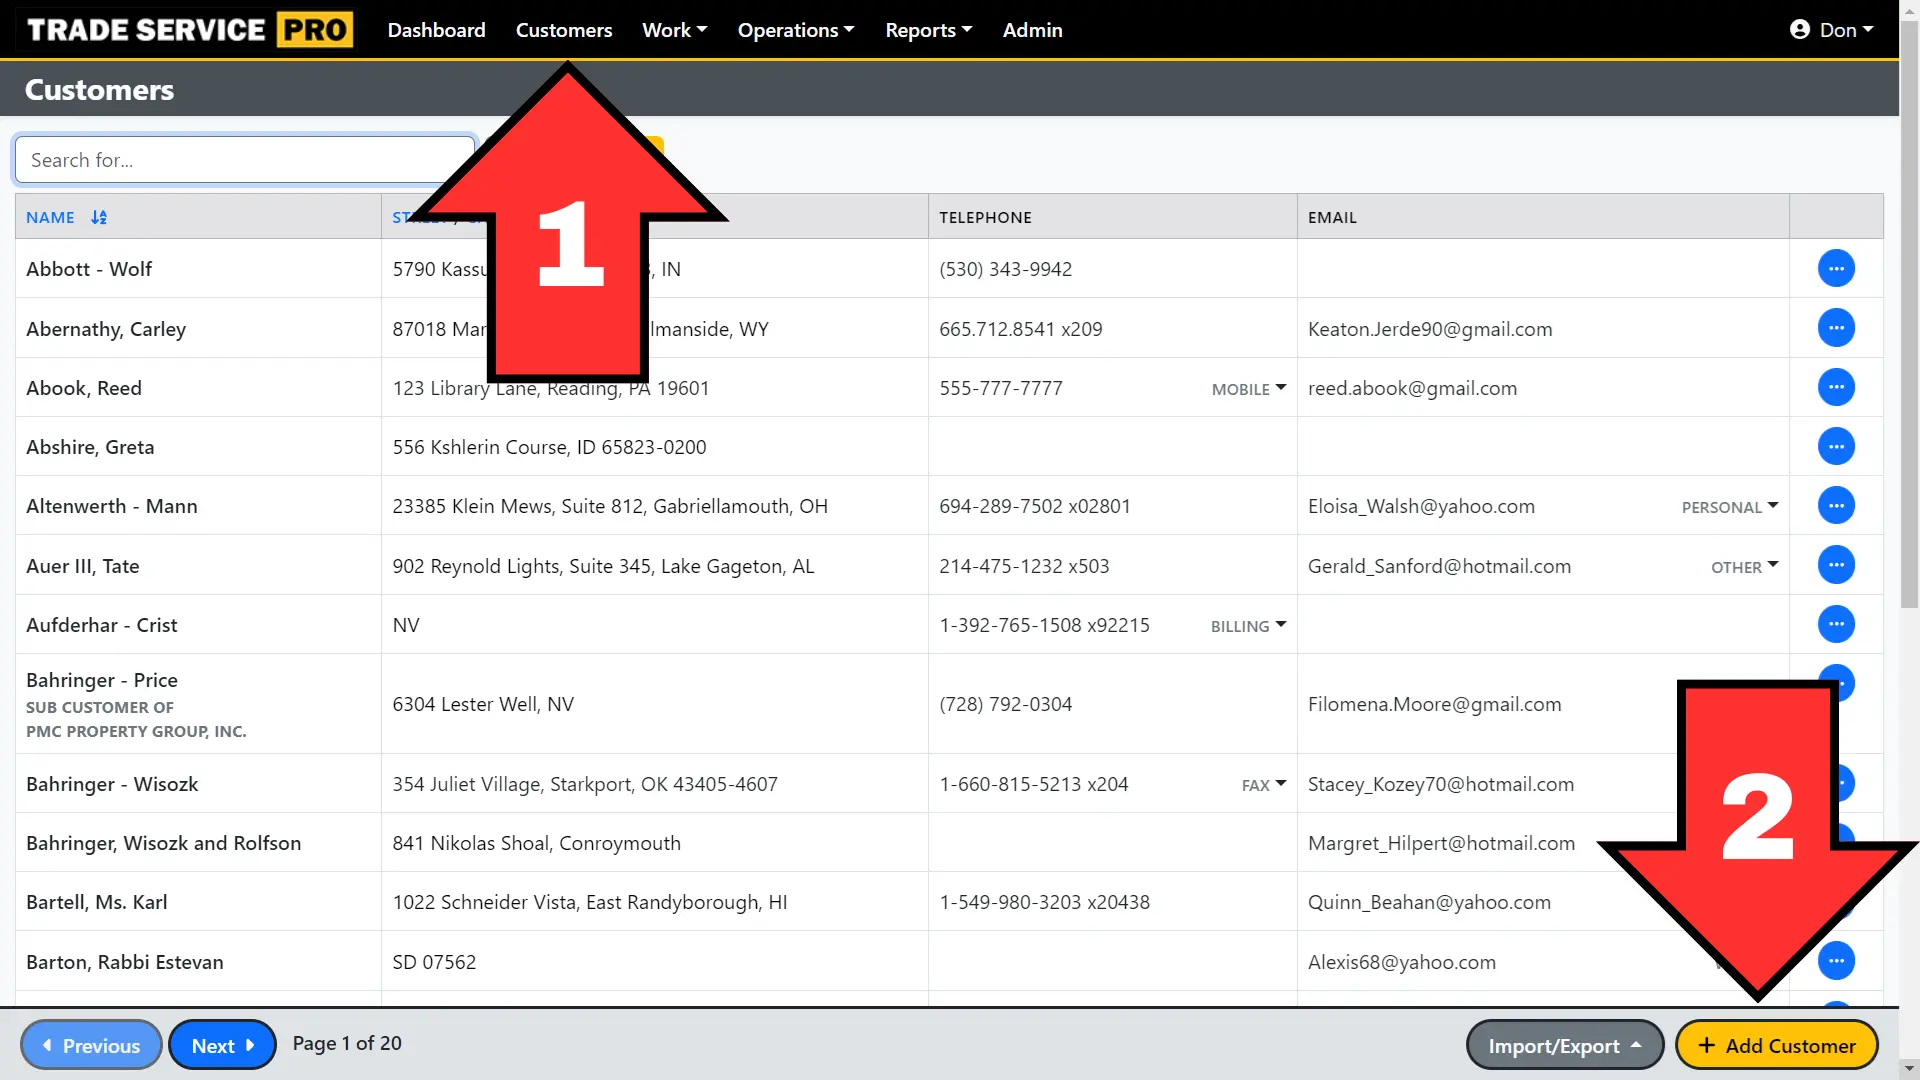
- If you aren't already on the customer list, click on the Customers menu item.
- Then click on the + Add Customer button in the bottom right corner of the screen. (This is where you'll find the add button for most features.)
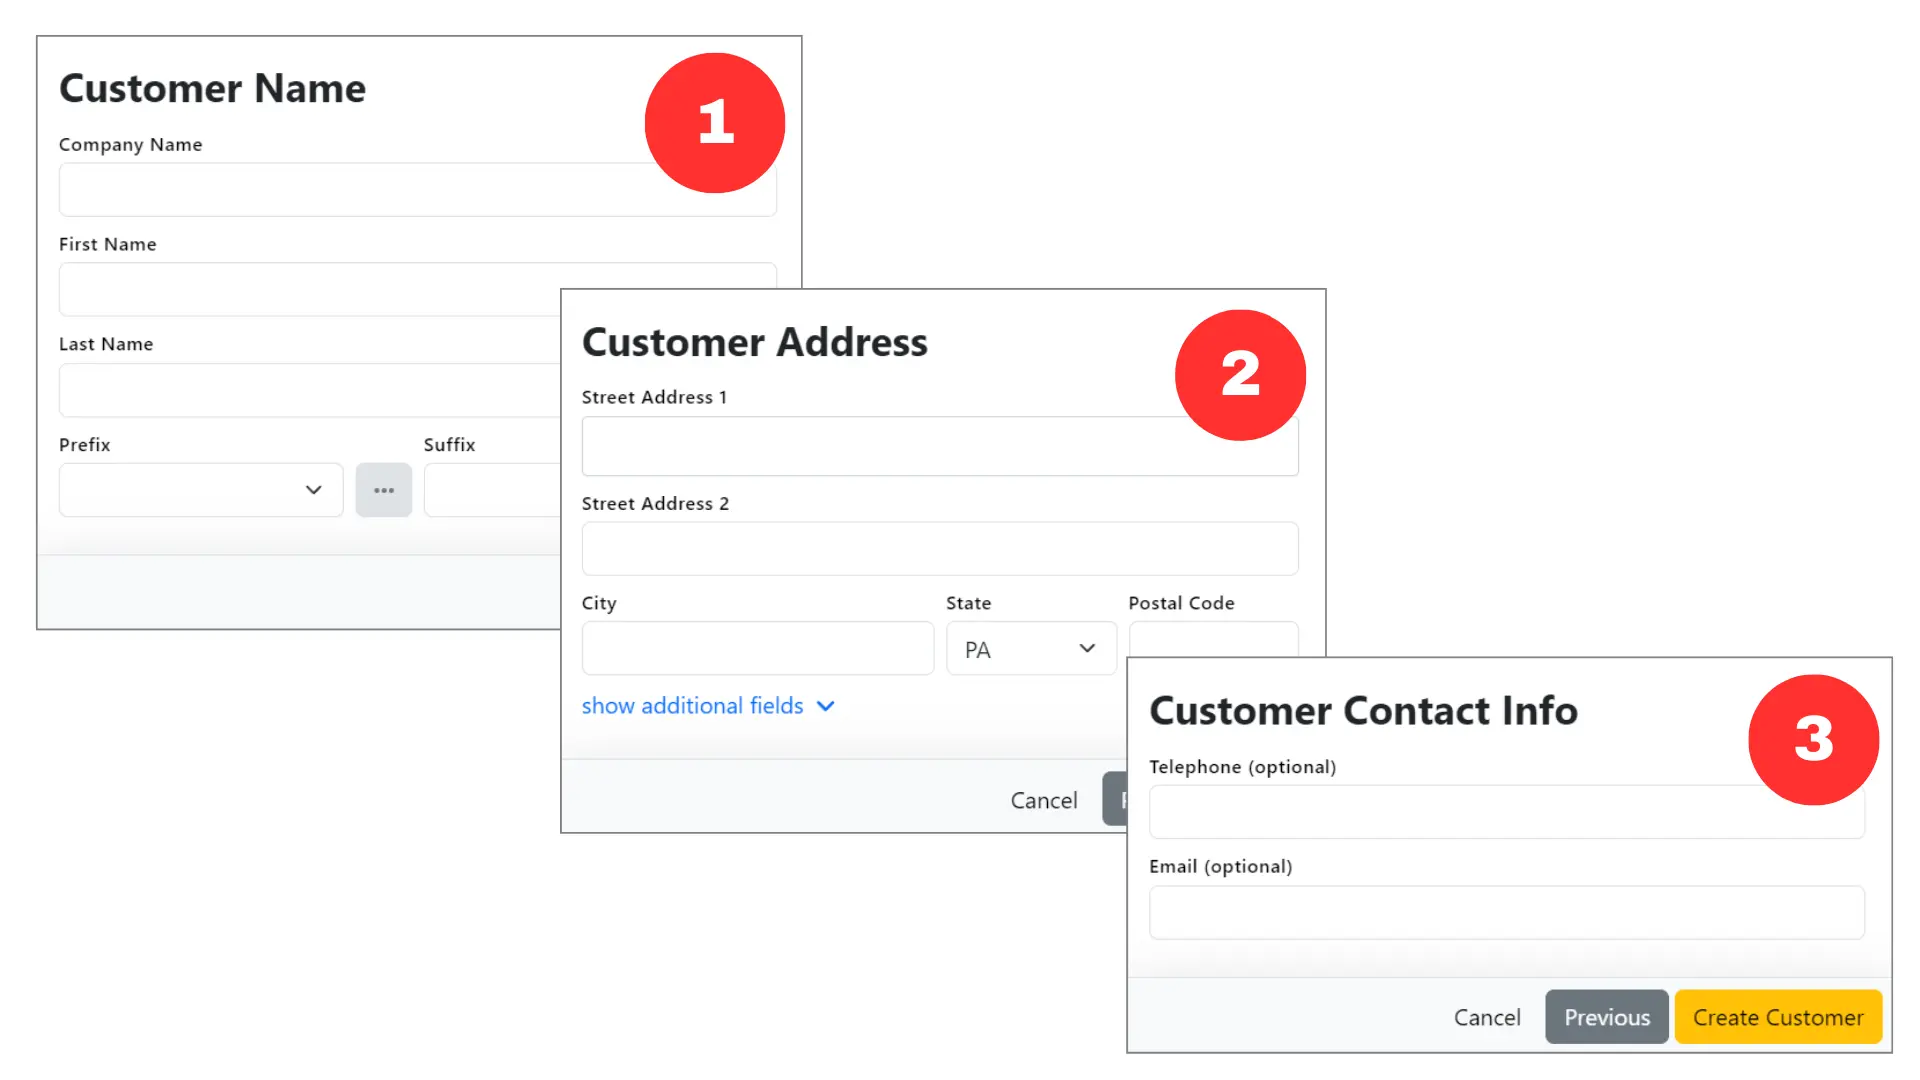
The create customer workflow will now present 3 steps to creating a new customer record. This 3-step process captures the basic customer information, their name, address, and contact information.
Once the customer has been created the full customer editor will be displayed. The full customer editor offers many more features and options. You can explore these features and options from the left nav.

Customer: this section contains the information you entered when initially creating the customer: name, address, and contact information are all available here.
Contacts and Addresses: create additional contacts for a customer, such as a spouse, or a billing contact. Additional addresses can be added here as well, for additional properties, rental properties, etc.
Forms: assign and edit custom data forms to capture detailed information about a customer. For example, and HVAC company might have a Heater Details form that captures information about the heating system make, model, and other information.
Images and Files: upload images and files related to the customer, take photos of customer equipment and/or upload files such as contracts.
Log: log customer interaction details here, such as phone calls or emails. Each log entry will capture the date/time stamp as well as the user who created the log entry.
Notes: free form text for creating any customer related notes.
Link to Parent Customer: use this option to assign the customer as a child to another parent customer. This is typically used for sub customers of a property management group.
Options: from here you can set a payment term, discount, tax override, and add customer tags.
Schedule: view all past, present, and future appointments for the customer.
Sub Customers: for parent customers (typically a property management group) you can view their child customers from here.
Mobile Device Instructions
Creating a customer on a mobile device is a similar process to creating a customer on a laptop or desktop. The screens will obviously be different based on the smaller screen size of a mobile device.
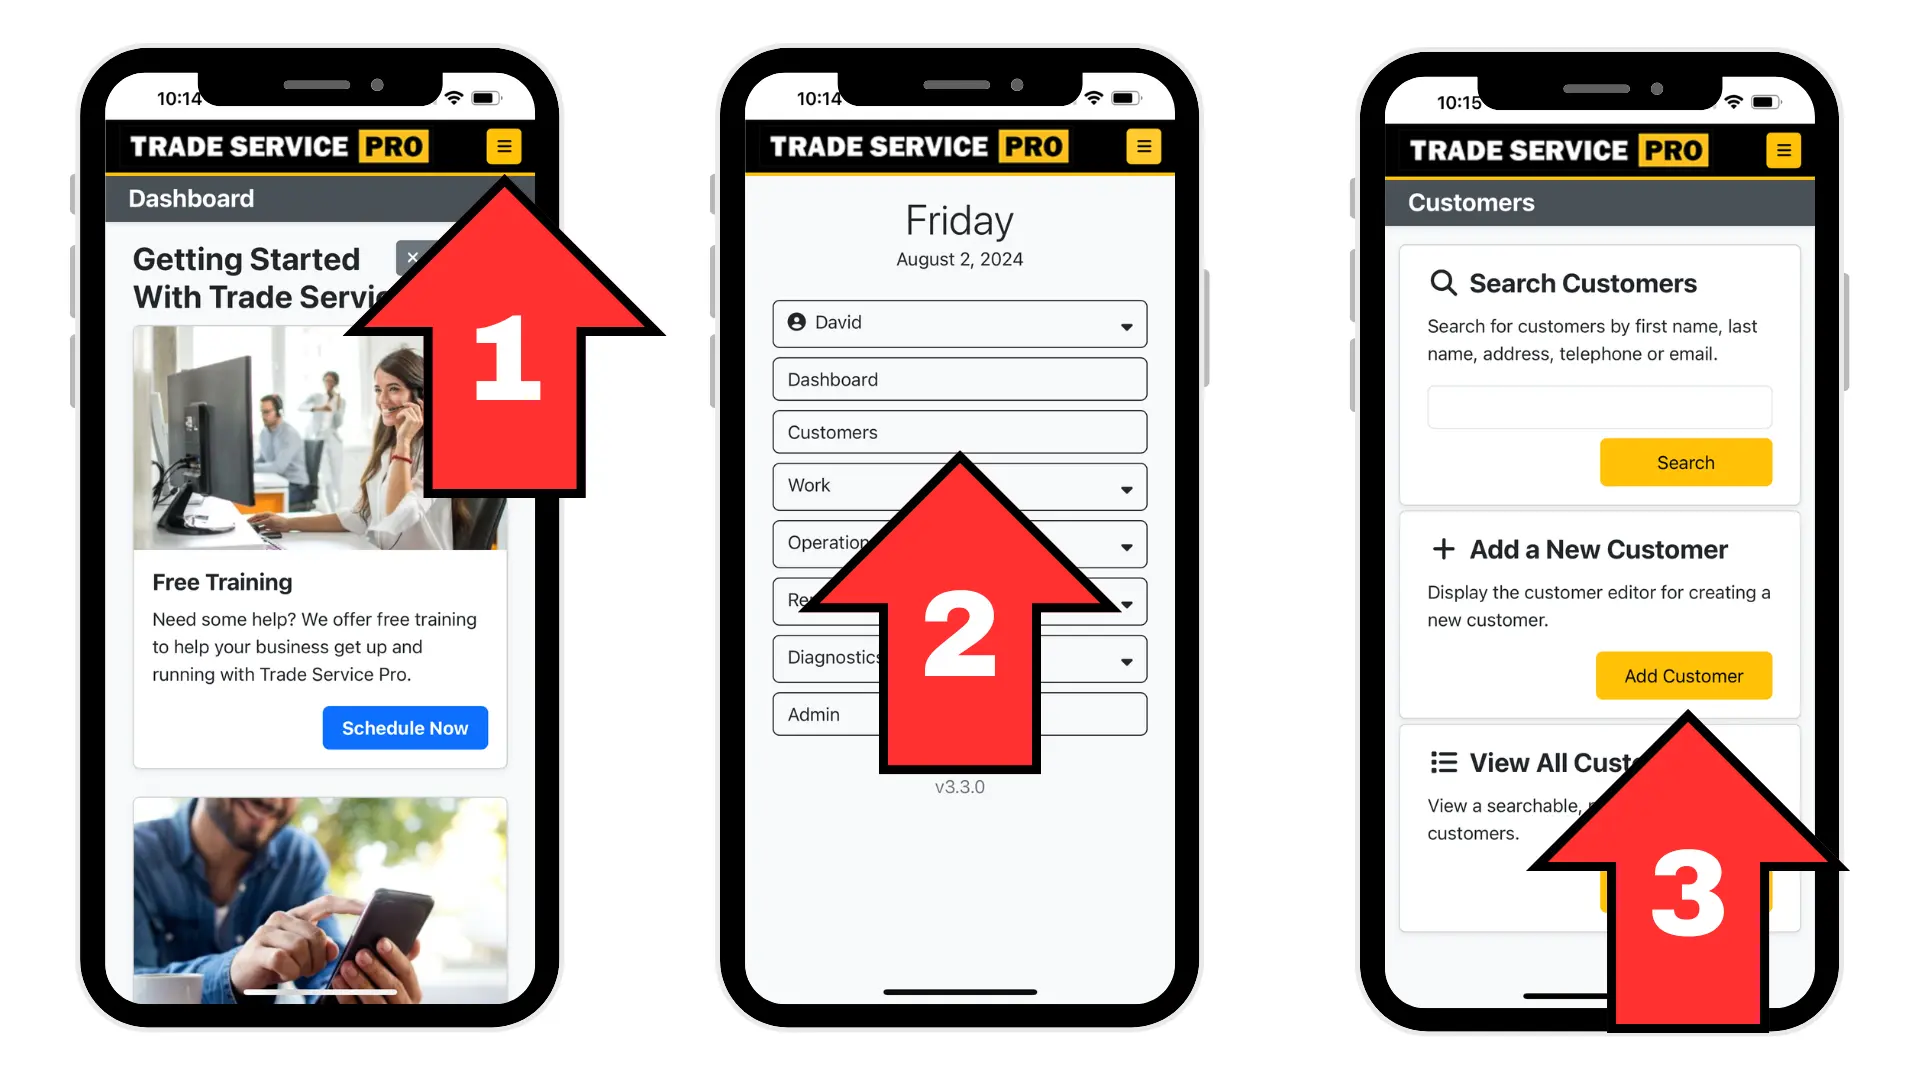
- From any page click on the yellow icon with the 3 lines (aka the hamburger button) on the top right of the mobile screen.
- The mobile navigation menu will be displayed. Click on the Customers button.
- Next, the customers mobile page will display which presents 3 options for working with customer data. Click on the Add Customer button.
The create customer workflow will now present 3 steps to creating a new customer record. This 3-step process captures the basic customer information, their name, address, and contact information.
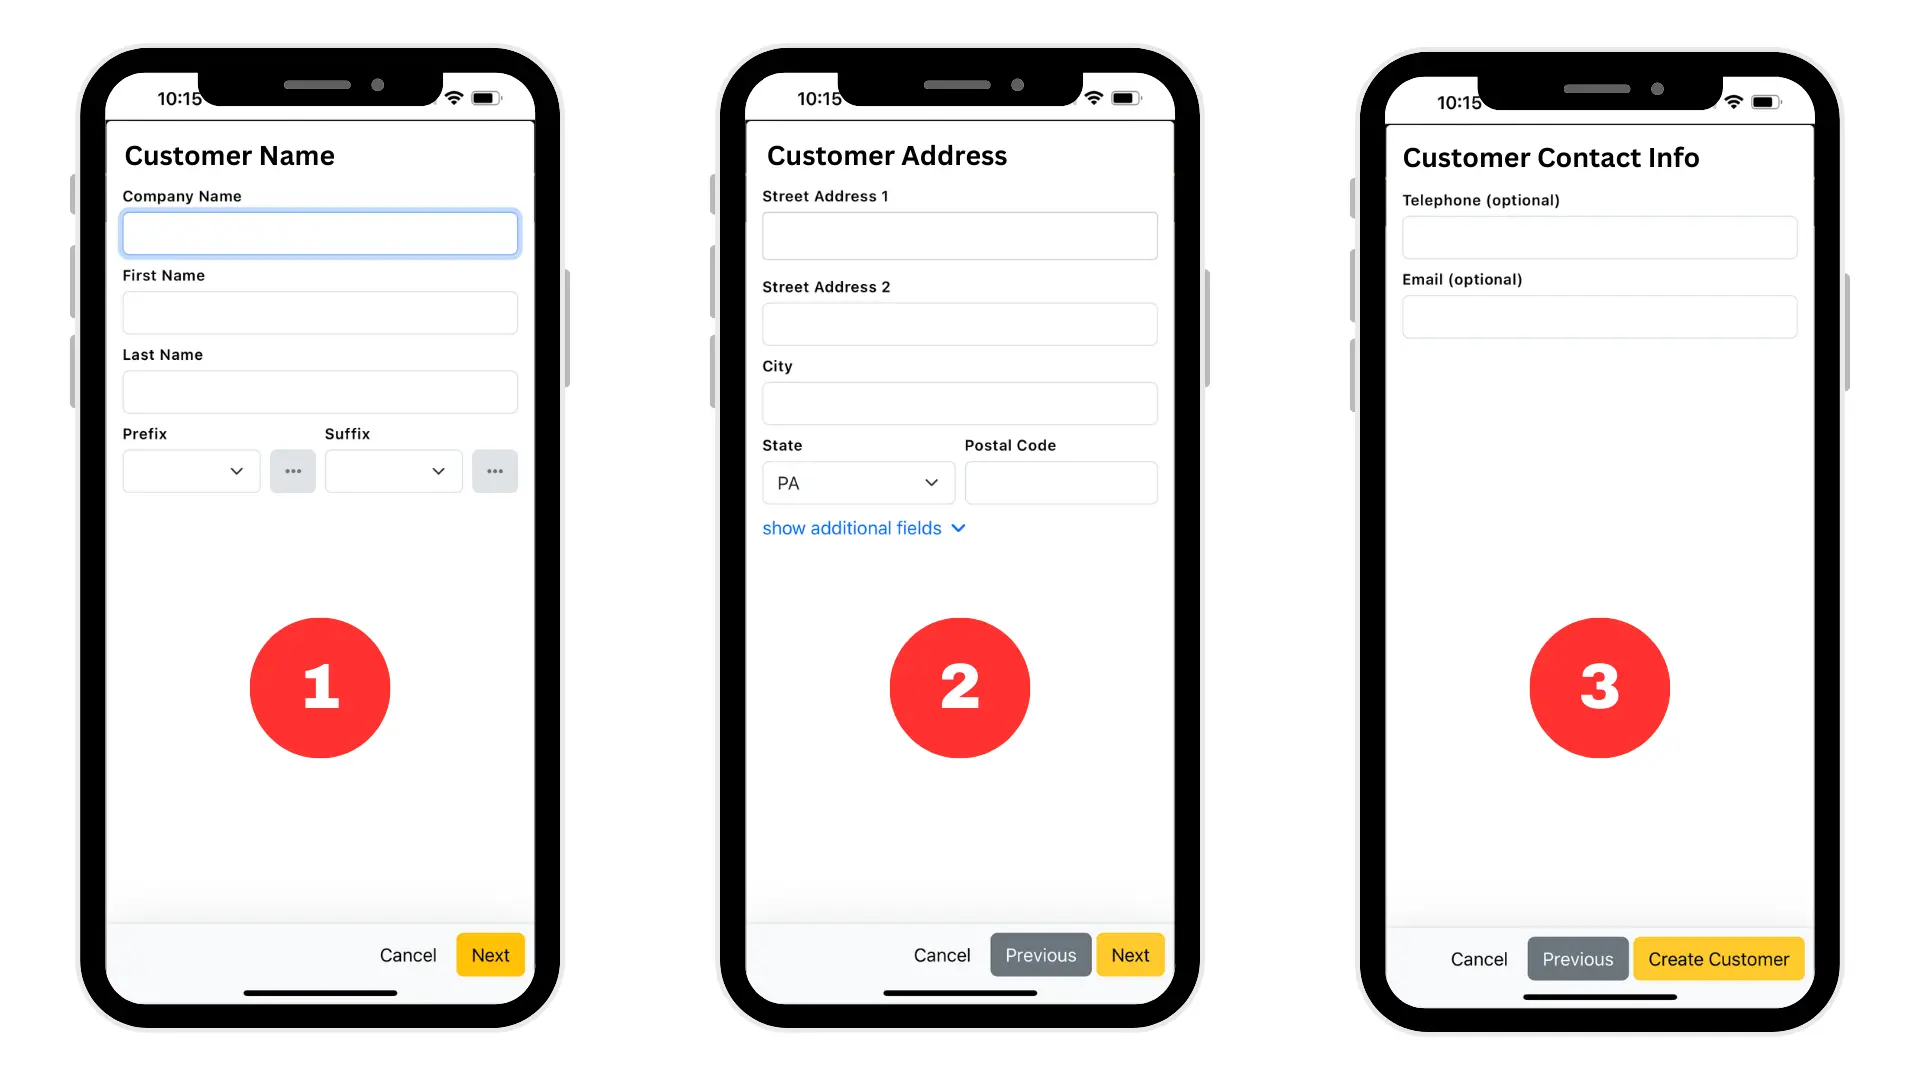
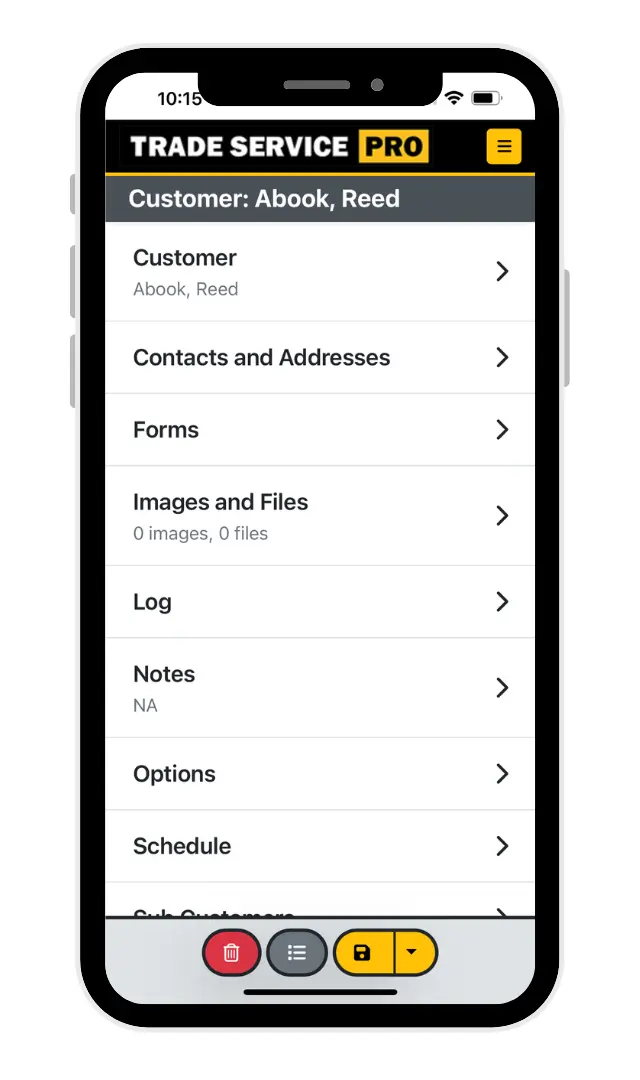
Once the customer has been created the full customer editor will be displayed. The full customer editor offers many more features and options. You can explore these features and options from the various mobile options (denoted by an outlined title with a right pointing chevron).
Customer: this section contains the information you entered when initially creating the customer: name, address, and contact information are all available here.
Contacts and Addresses: create additional contacts for a customer, such as a spouse, or a billing contact. Additional addresses can be added here as well, for additional properties, rental properties, etc.
Forms: assign and edit custom data forms to capture detailed information about a customer. For example, and HVAC company might have a Heater Details form that captures information about the heating system make, model, and other information.
Images and Files: upload images and files related to the customer, take photos of customer equipment and/or upload files such as contracts.
Log: log customer interaction details here, such as phone calls or emails. Each log entry will capture the date/time stamp as well as the user who created the log entry.
Notes: free form text for creating any customer related notes.
Link to Parent Customer: use this option to assign the customer as a child to another parent customer. This is typically used for sub customers of a property management group.
Options: from here you can set a payment term, discount, tax override, and add customer tags.
Schedule: view all past, present, and future appointments for the customer.
Sub Customers: for parent customers (typically a property management group) you can view their child customers from here.